Basics of an Escape Room
6. How to Create an Escape Room
In this chapter, you can find instruction on how to create an escape room in Google Froms.
Creating an Escape Room!
1. The first step of creating an Escape Room is to decide on a theme and storyline. For example, “A Castle Escape” where the players are stuck in a castle and their objective is to escape a hungry dragon.
2. Go to Google Disc and click on “New”
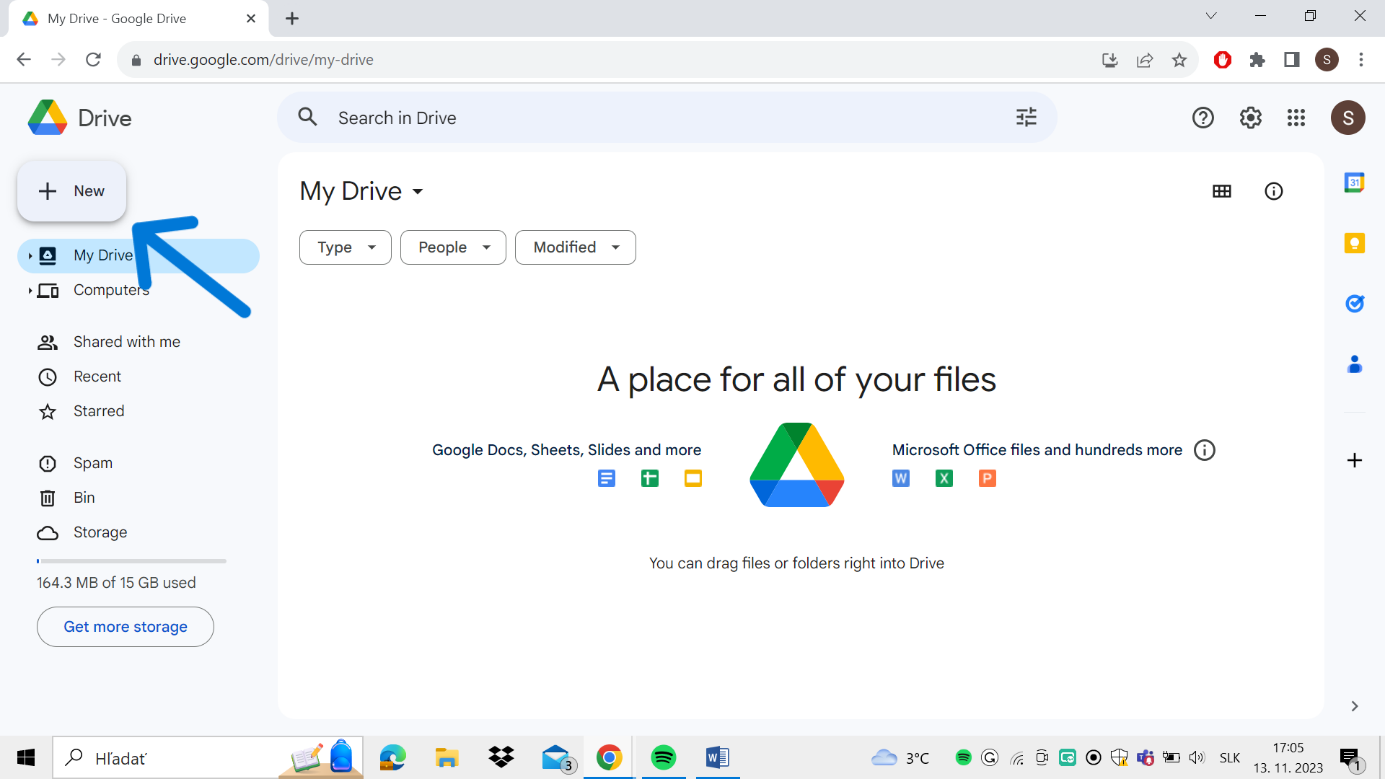
A choice of options should appear, click on a small arrow on the edge of the Google Forms option, and then click on the “Blank form”

3. You
can rename your escape room and add a little story about it in the first 2 text
fields.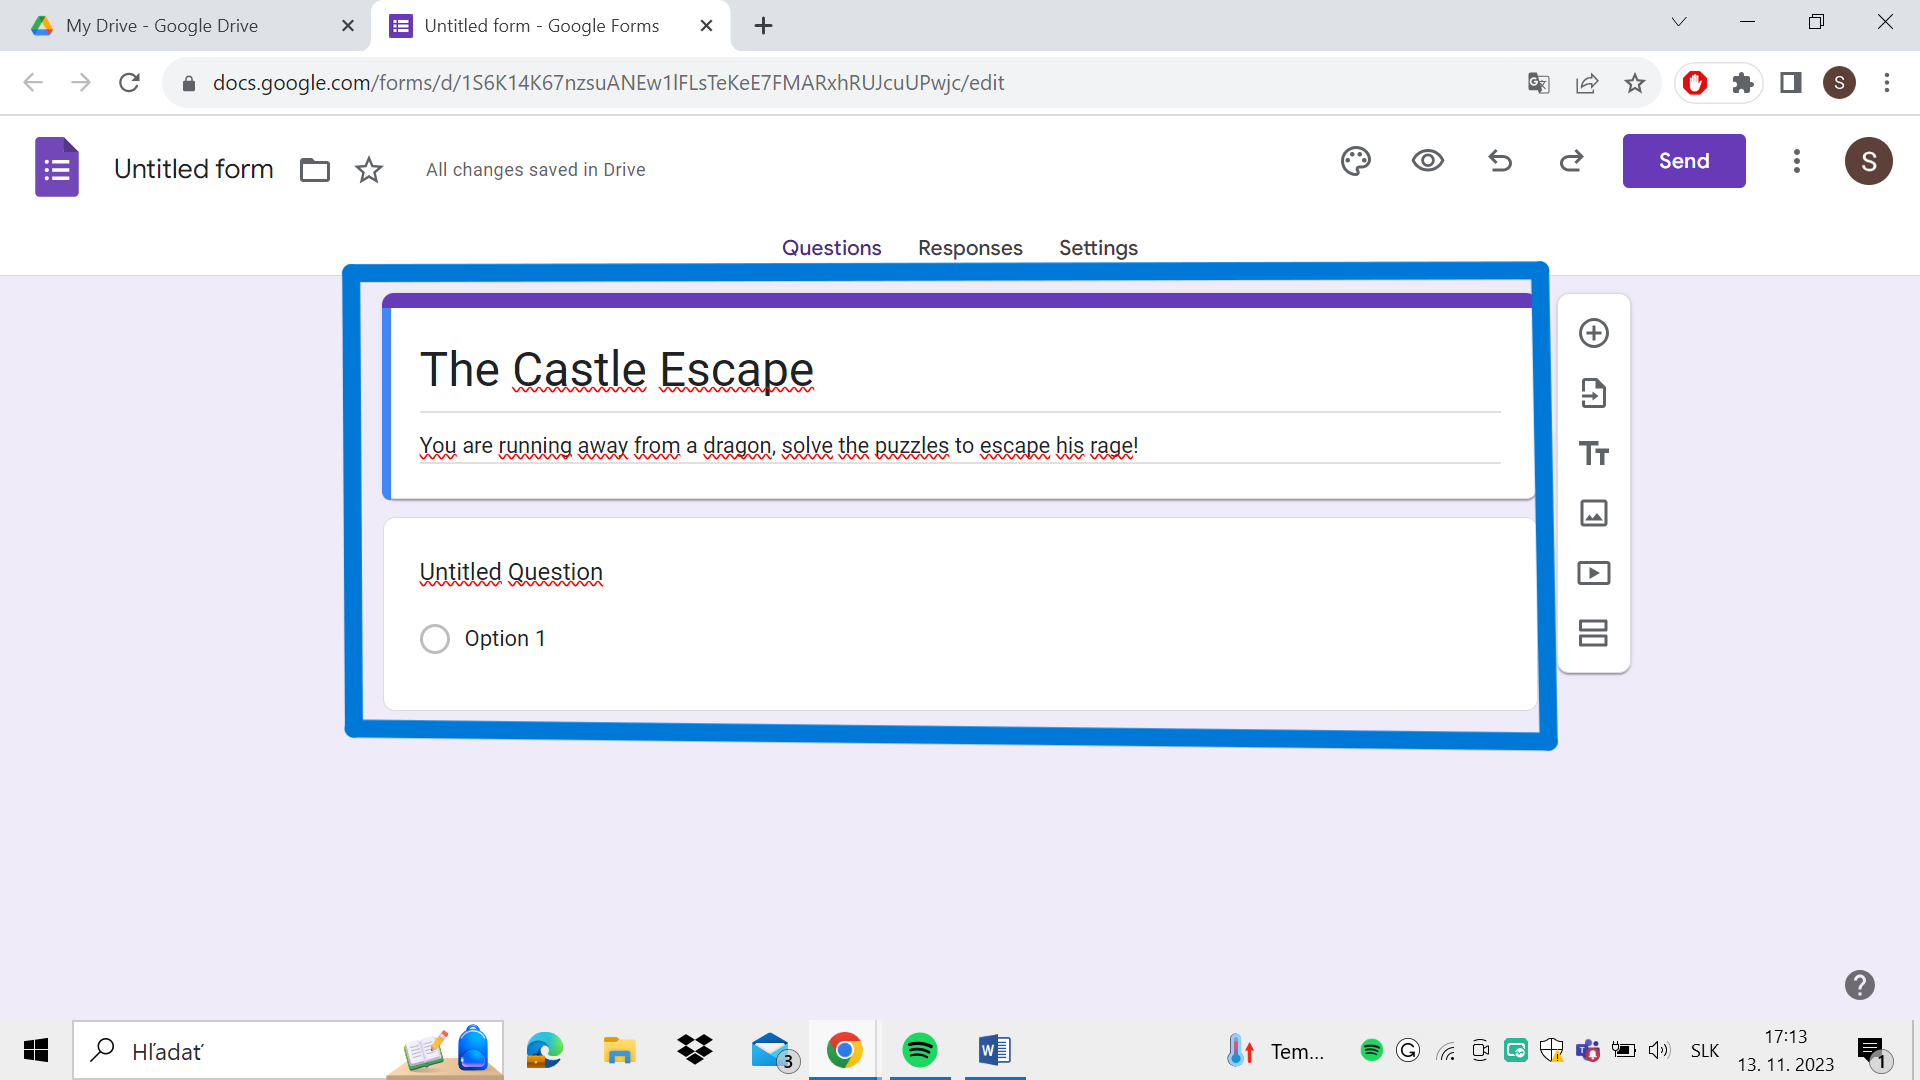
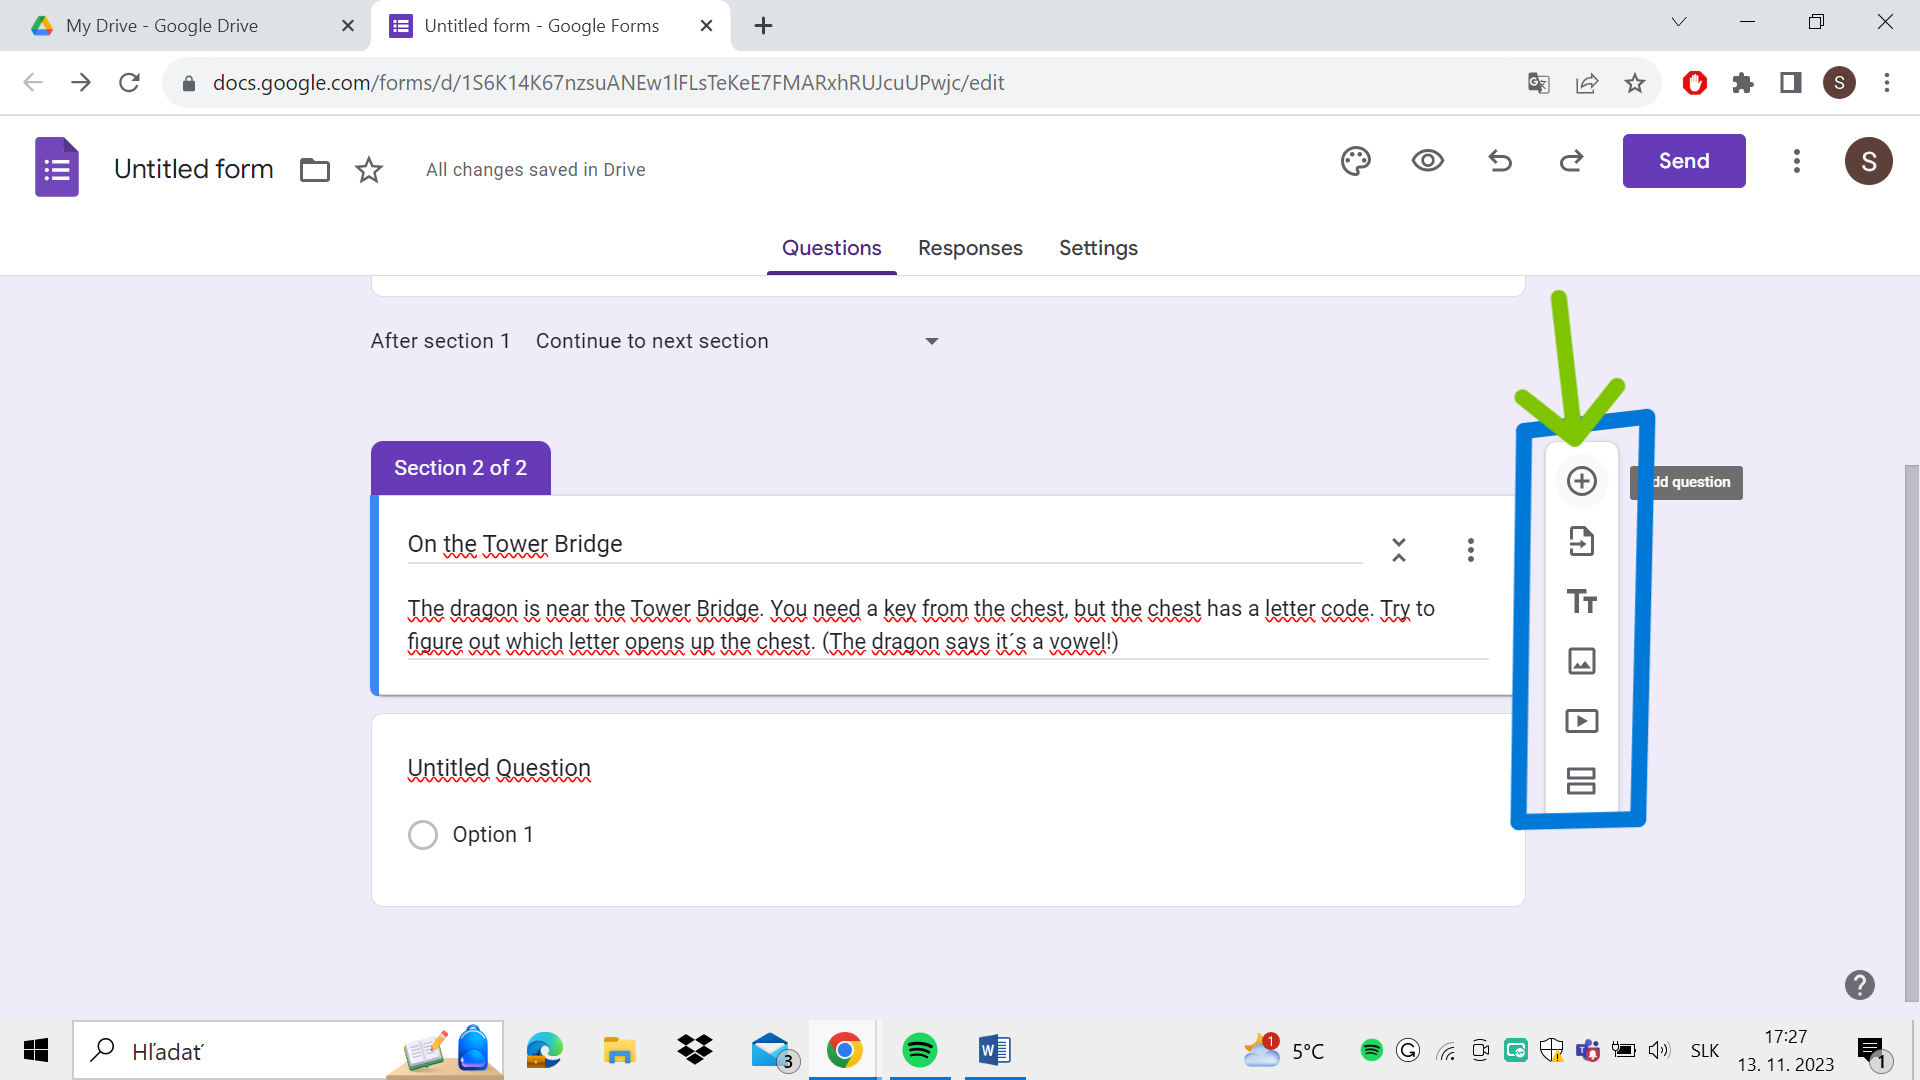
4. Now create sections, they serve as different “rooms” in your escape room game. To create a section, click on the two horizontal rectangles on the right panel.

Create how many sections you want, depending on how many rooms/activities you want to have in your Escape Room.
5. Each section is marked by a number and can have its own name and story, which you can add. You can also add a little hint to help the participants figure out the answer.

6. To create a task, click on the one from the following list on the right. The options provided are: “Add question, Import questions, Add title and description, Add image, Add video”, and “Add section” which we already used. The simplest tasks are created by “Add question”.
7. Now that you created a question, you can add the question itself. Choose what kind of answers you want from the “Multiple choice” box. Don’t forget to tick “Required” under ALL QUESTIONS.
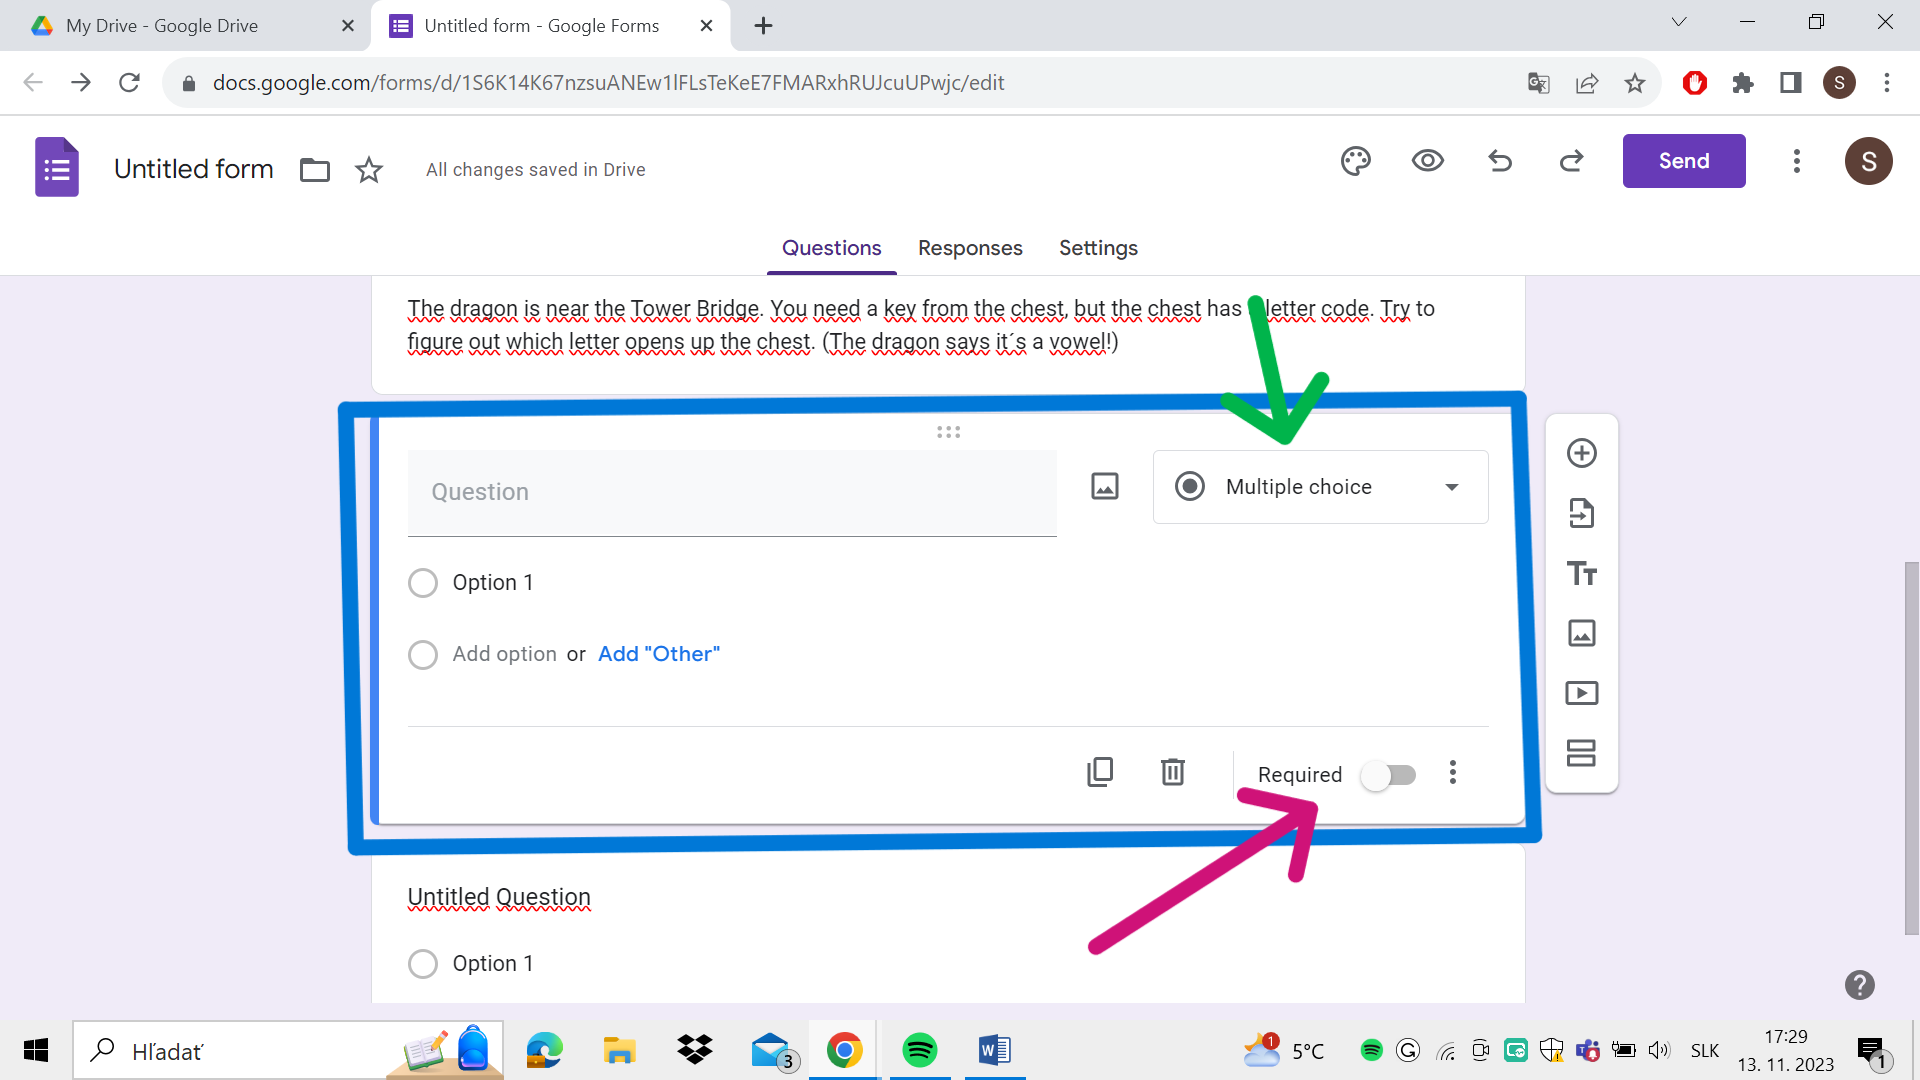
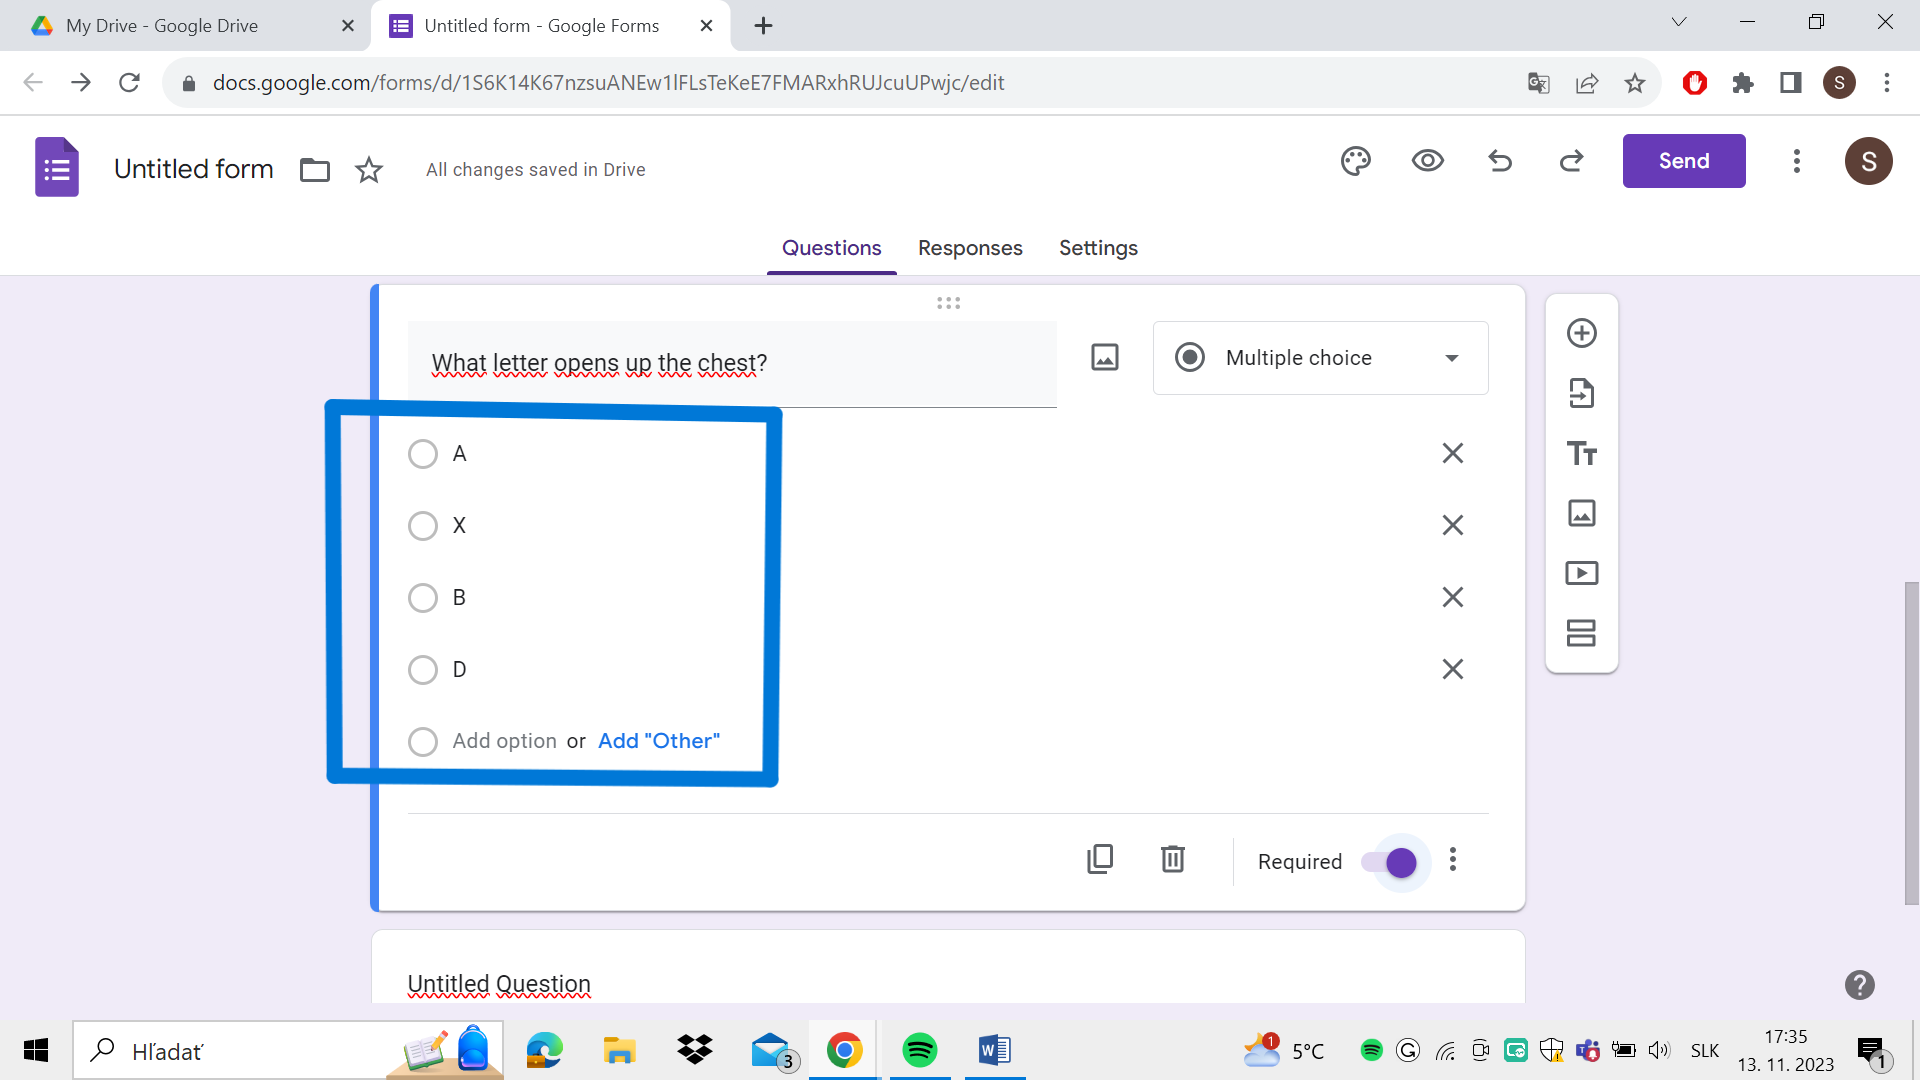
8. Based on what u chose, add answers to your question. By clicking on “Add option” under “Option 1” (last picture), you create answers.
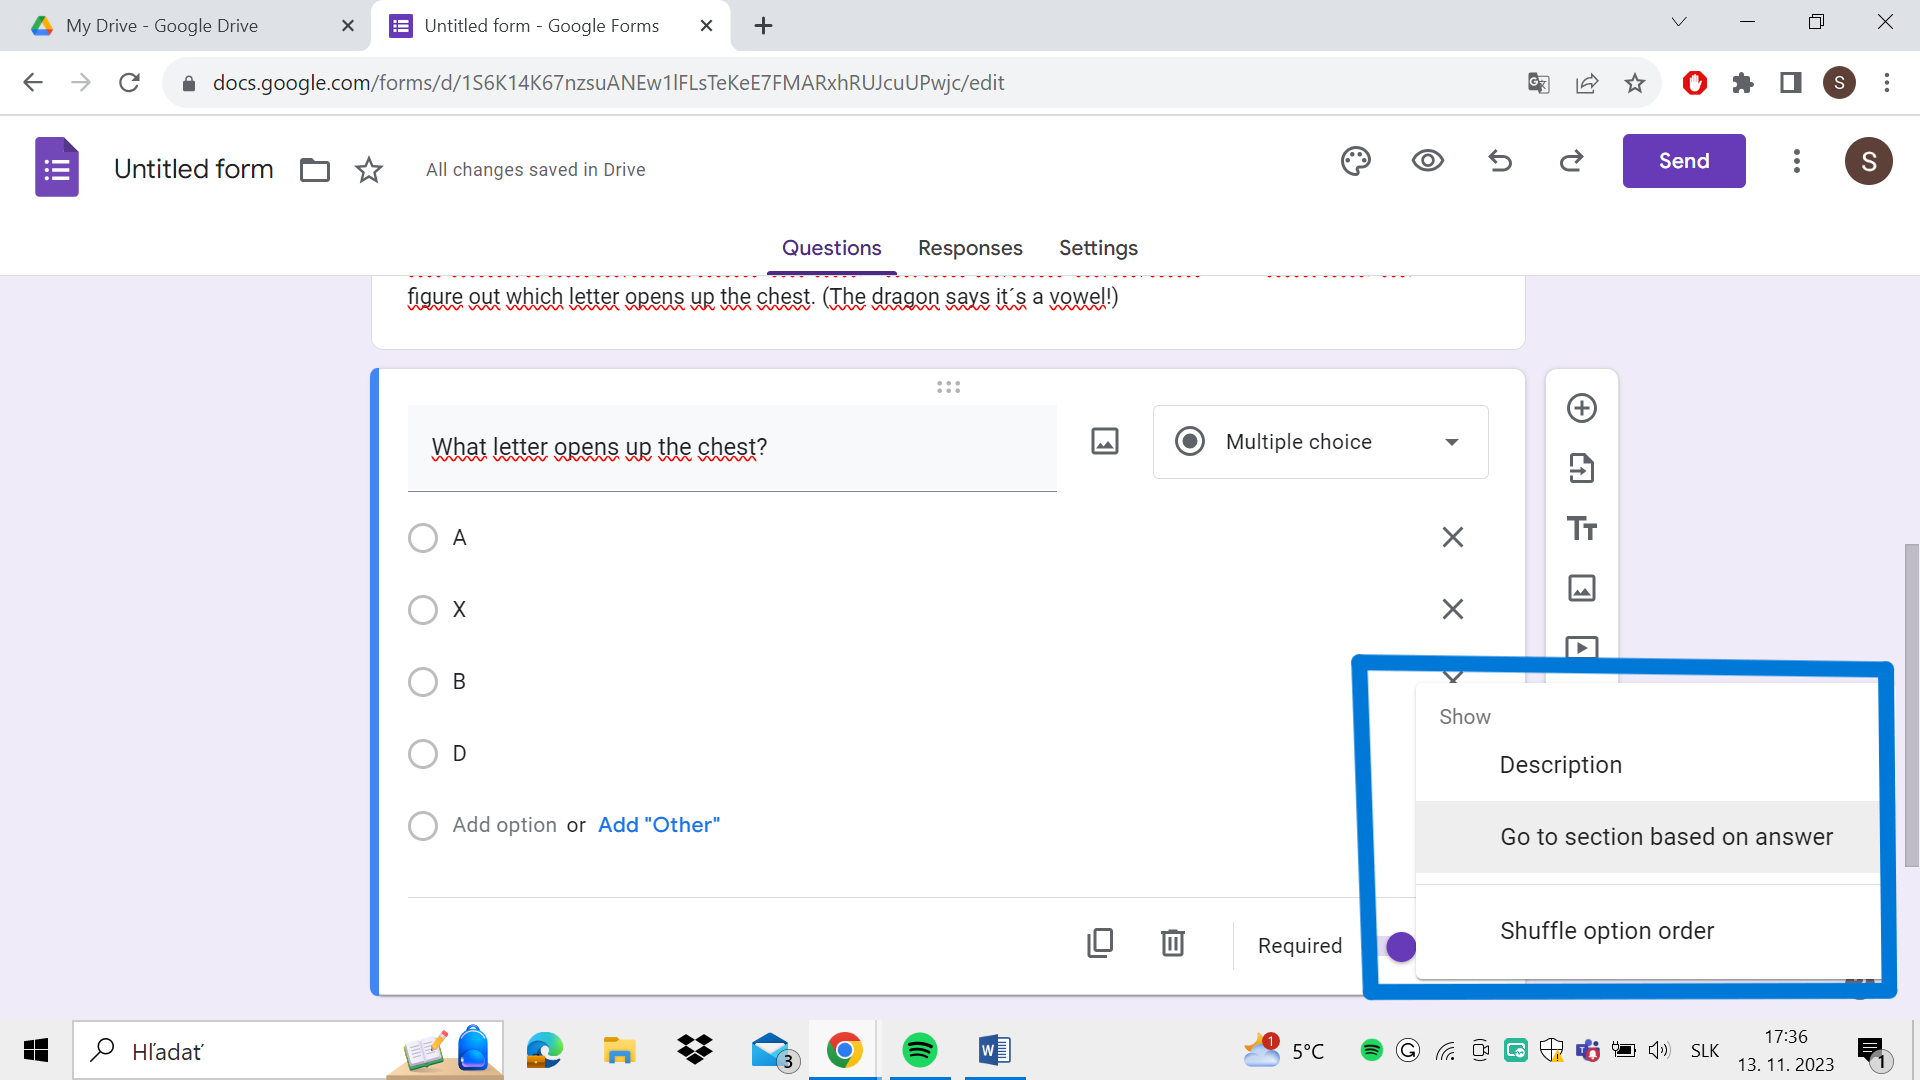
9. Now, click on the 3 dots beside the “Required” mark and continue to “Go to section based on answer”. Here you can choose, which answer moves you forward and which gets you stuck in the same “room”.
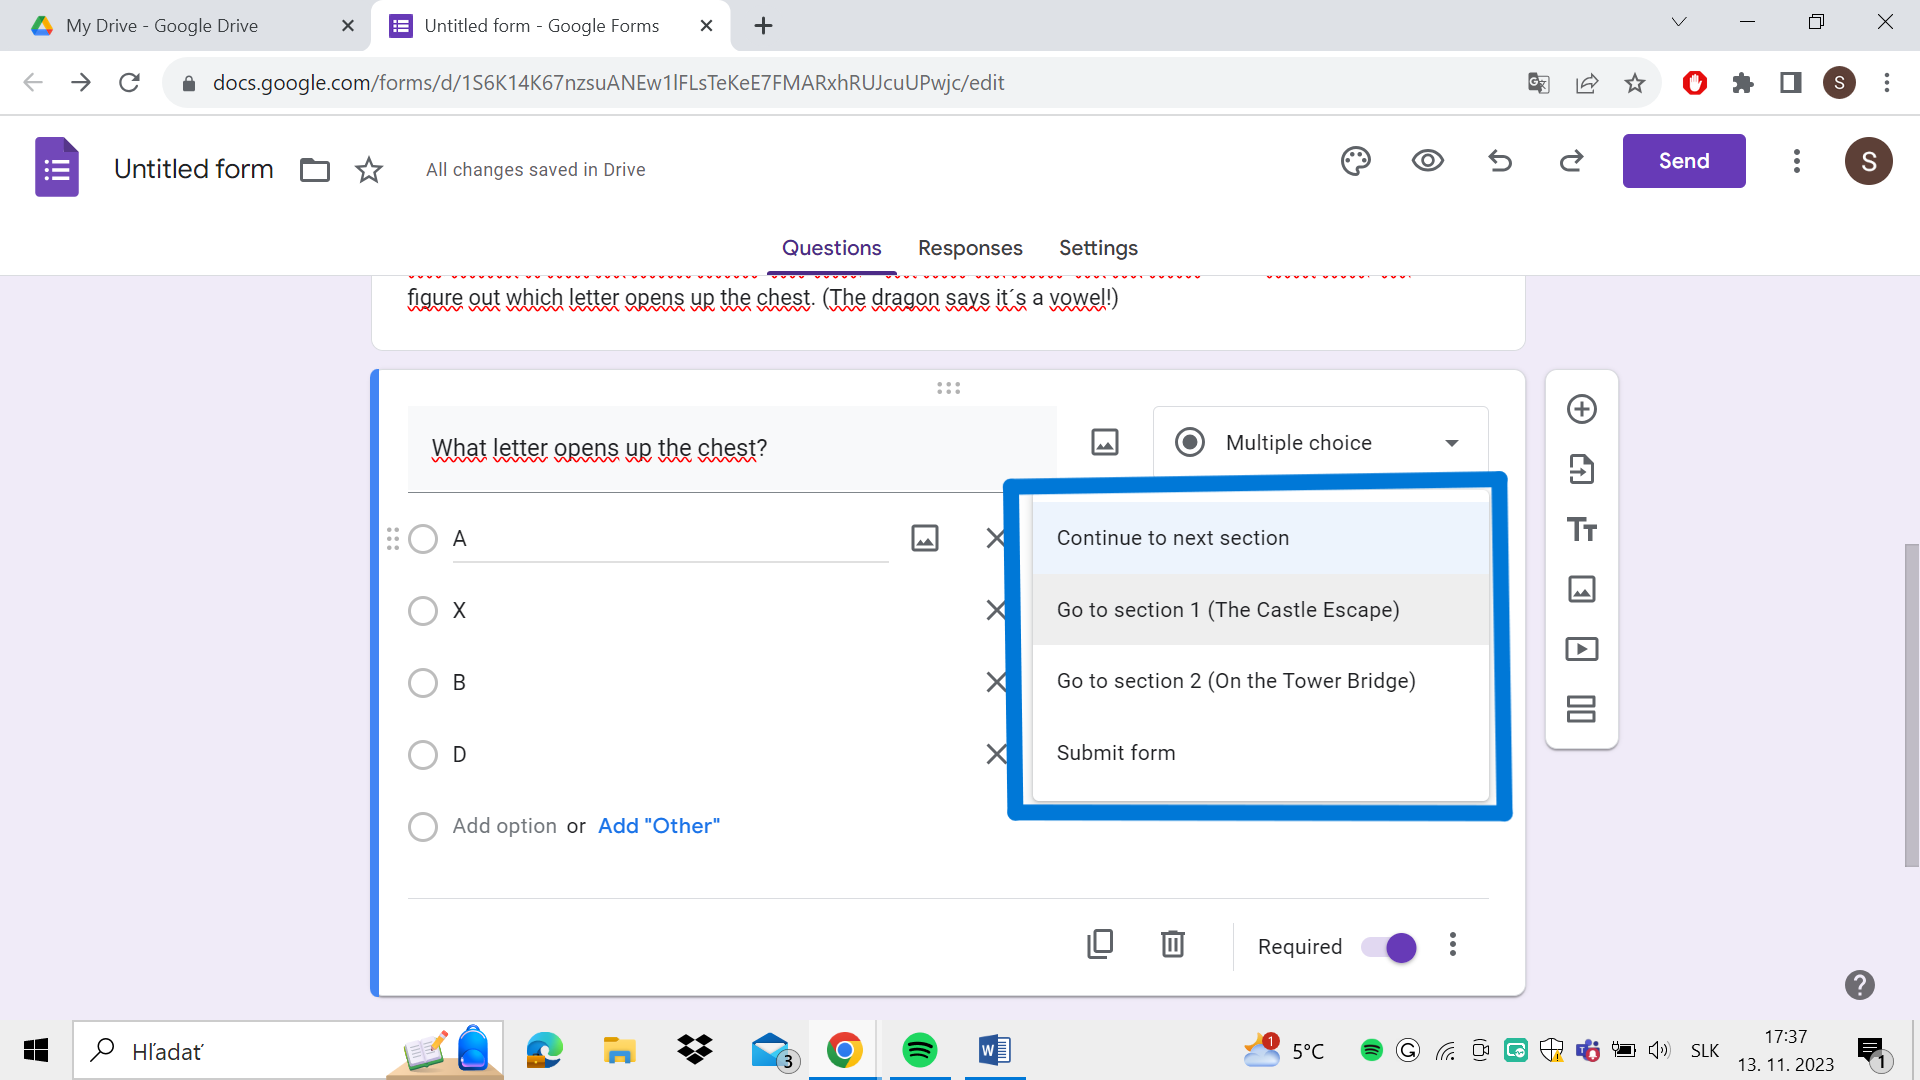
To move forward choose the “Continue to the next section” option beside the answer. Other should have “Go to section x” (The x stands for the section number the question is in, so if we are in section 2 question, the wrong answer should have “Go to section 2”). So the final look should be:
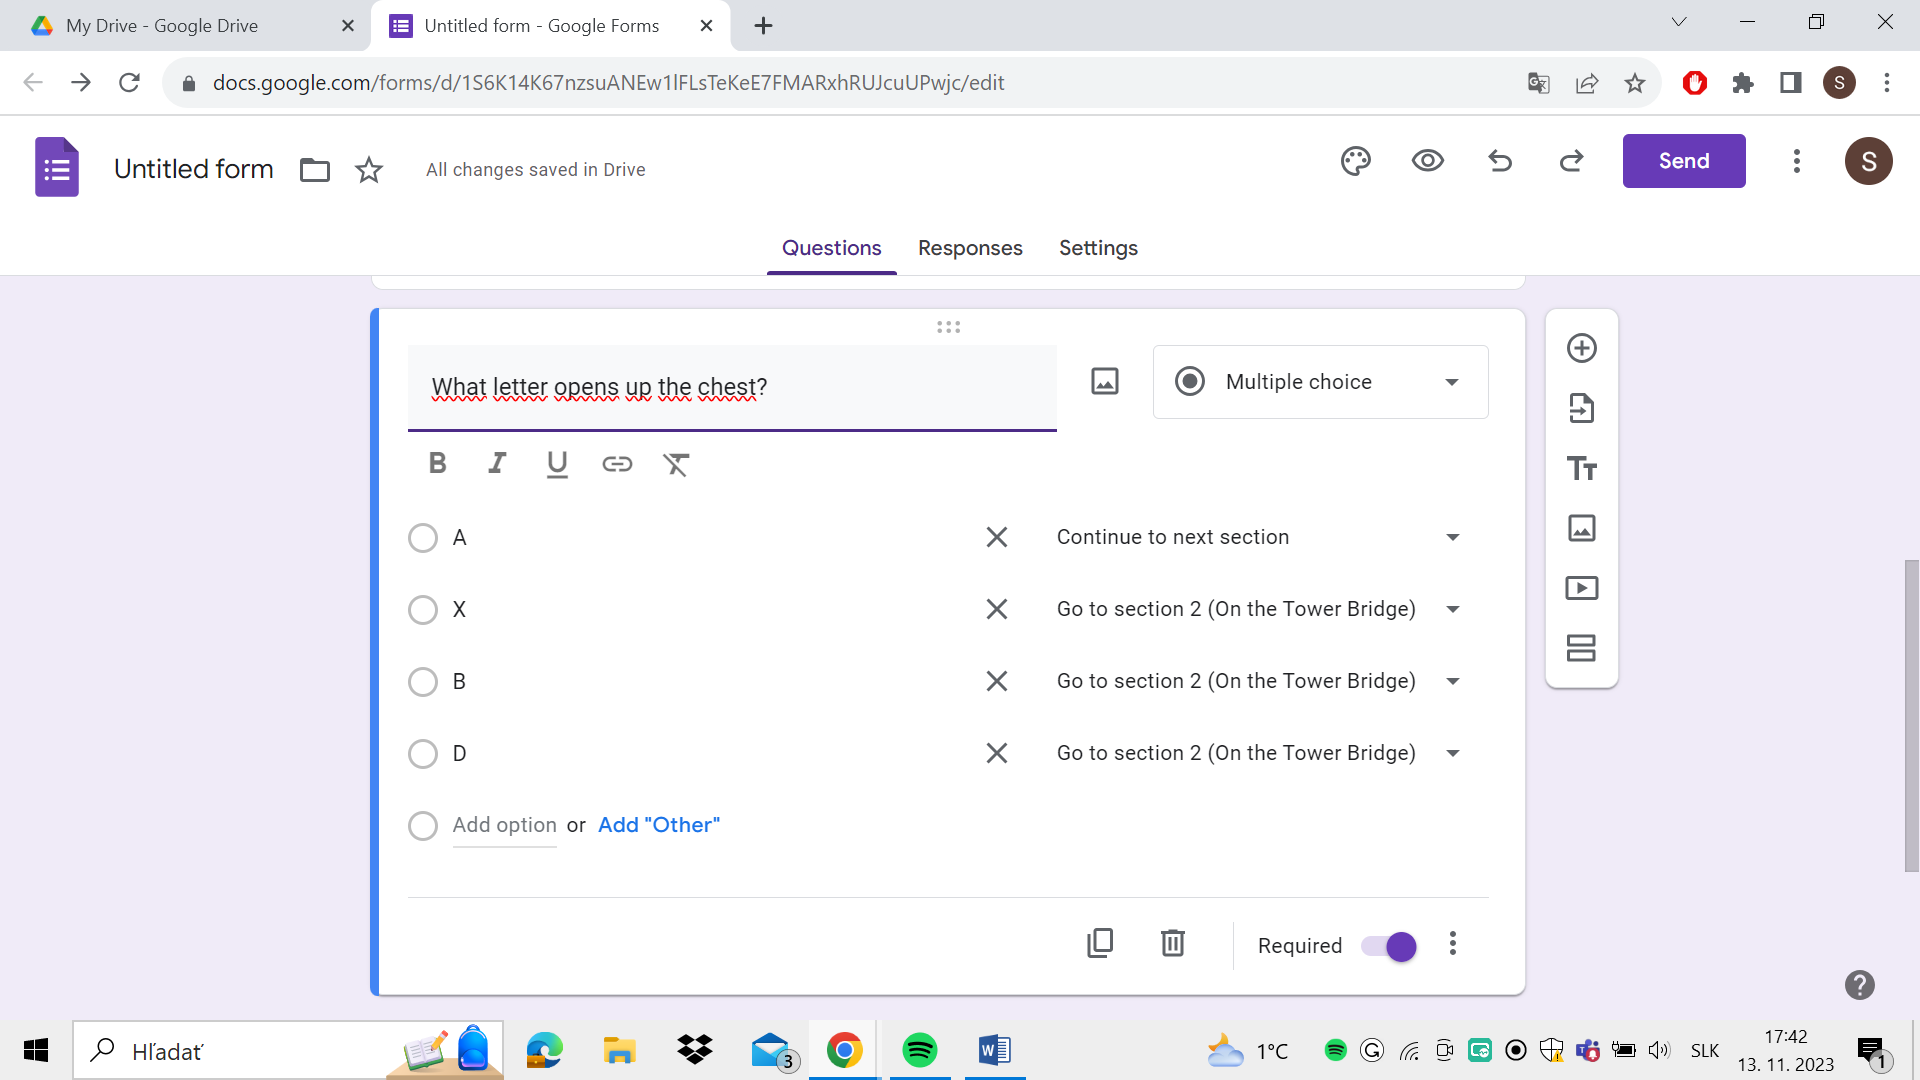
Congratulations, now you know how to do a question-based task in an escape room. Now let´s have a look at the text-based one.
10. To create a text-based question, you must first create a new section (Step 4), and then click on the “Multiple choice” box and choose the “Short answer” option. Also don’t forget to tick the “Required” option.
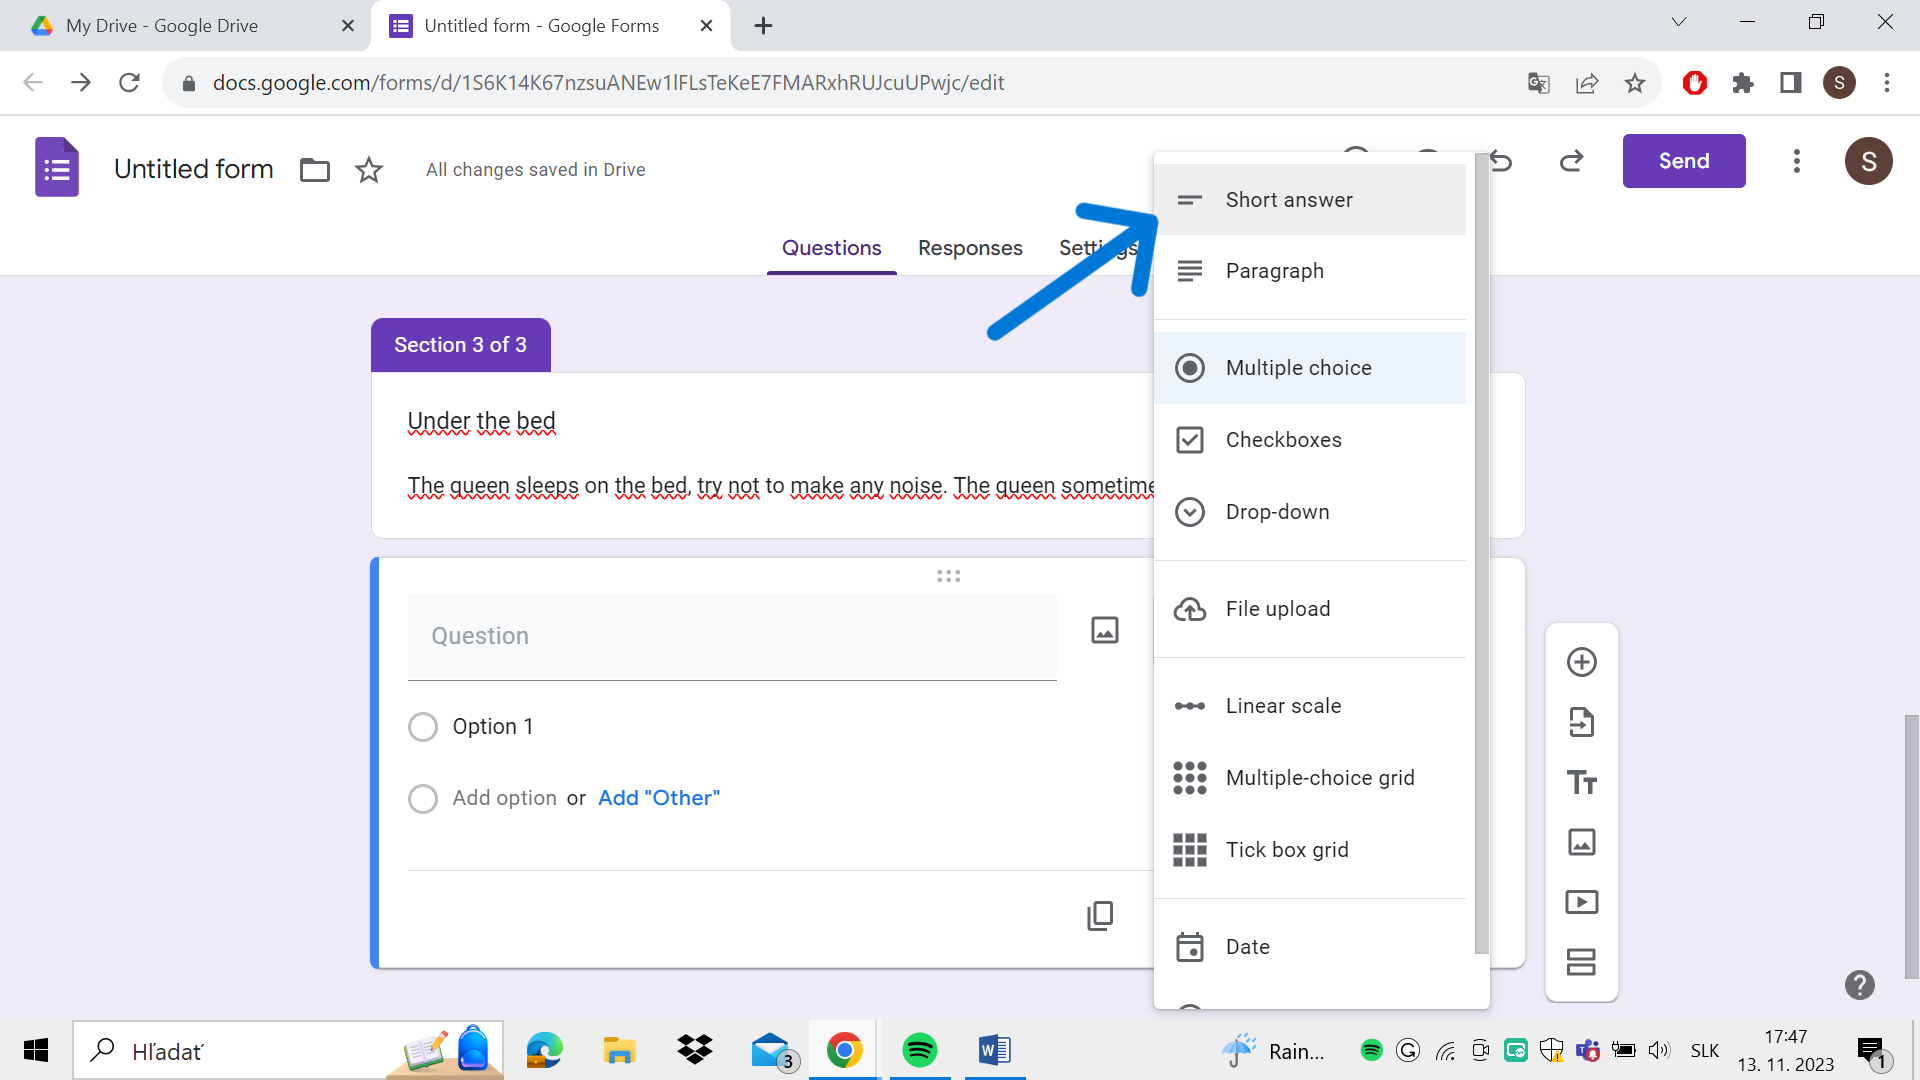
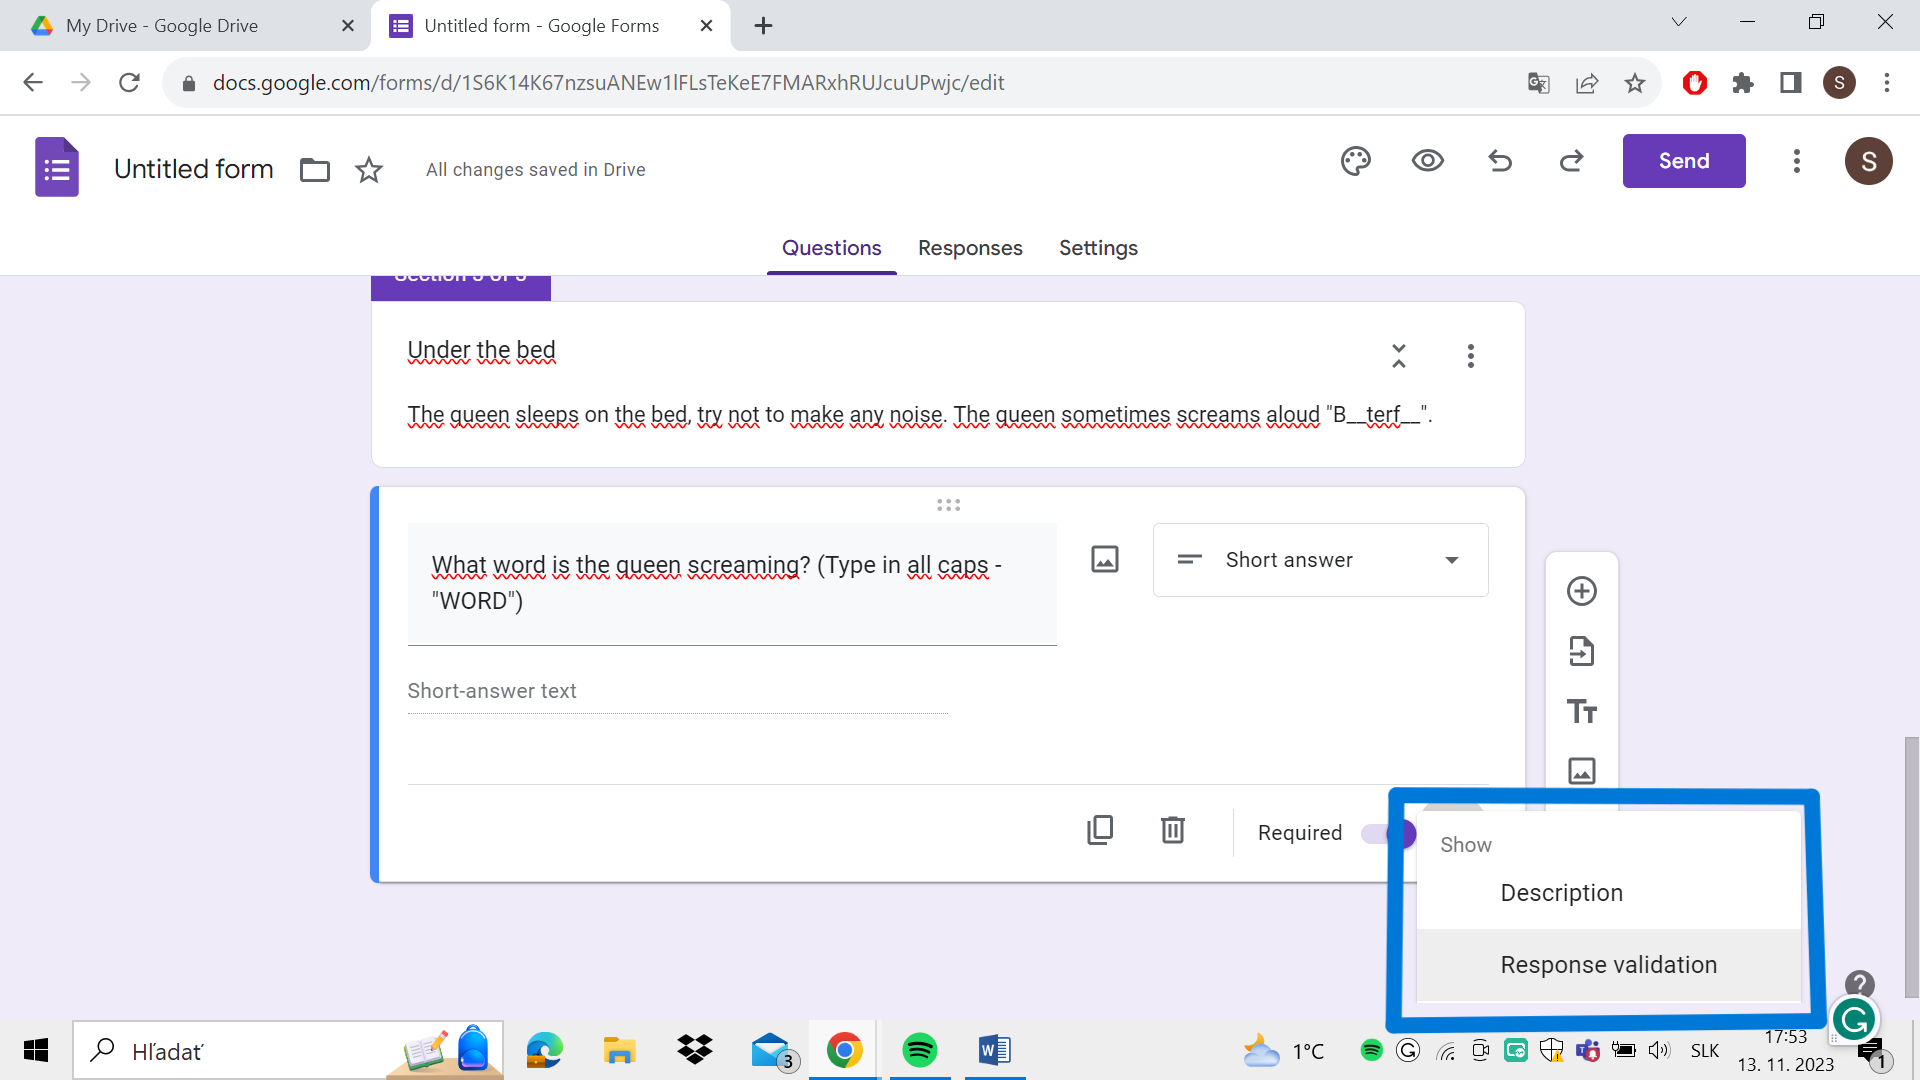
11. Create a question (To avoid misunderstandings, get the participants to answer in all caps), and then click on the 3 dots and go to “Response validation”
12. Change the “Number” option to “Text” and write down the answer in all caps. You can write down also a message if the participant gets the answer wrong.
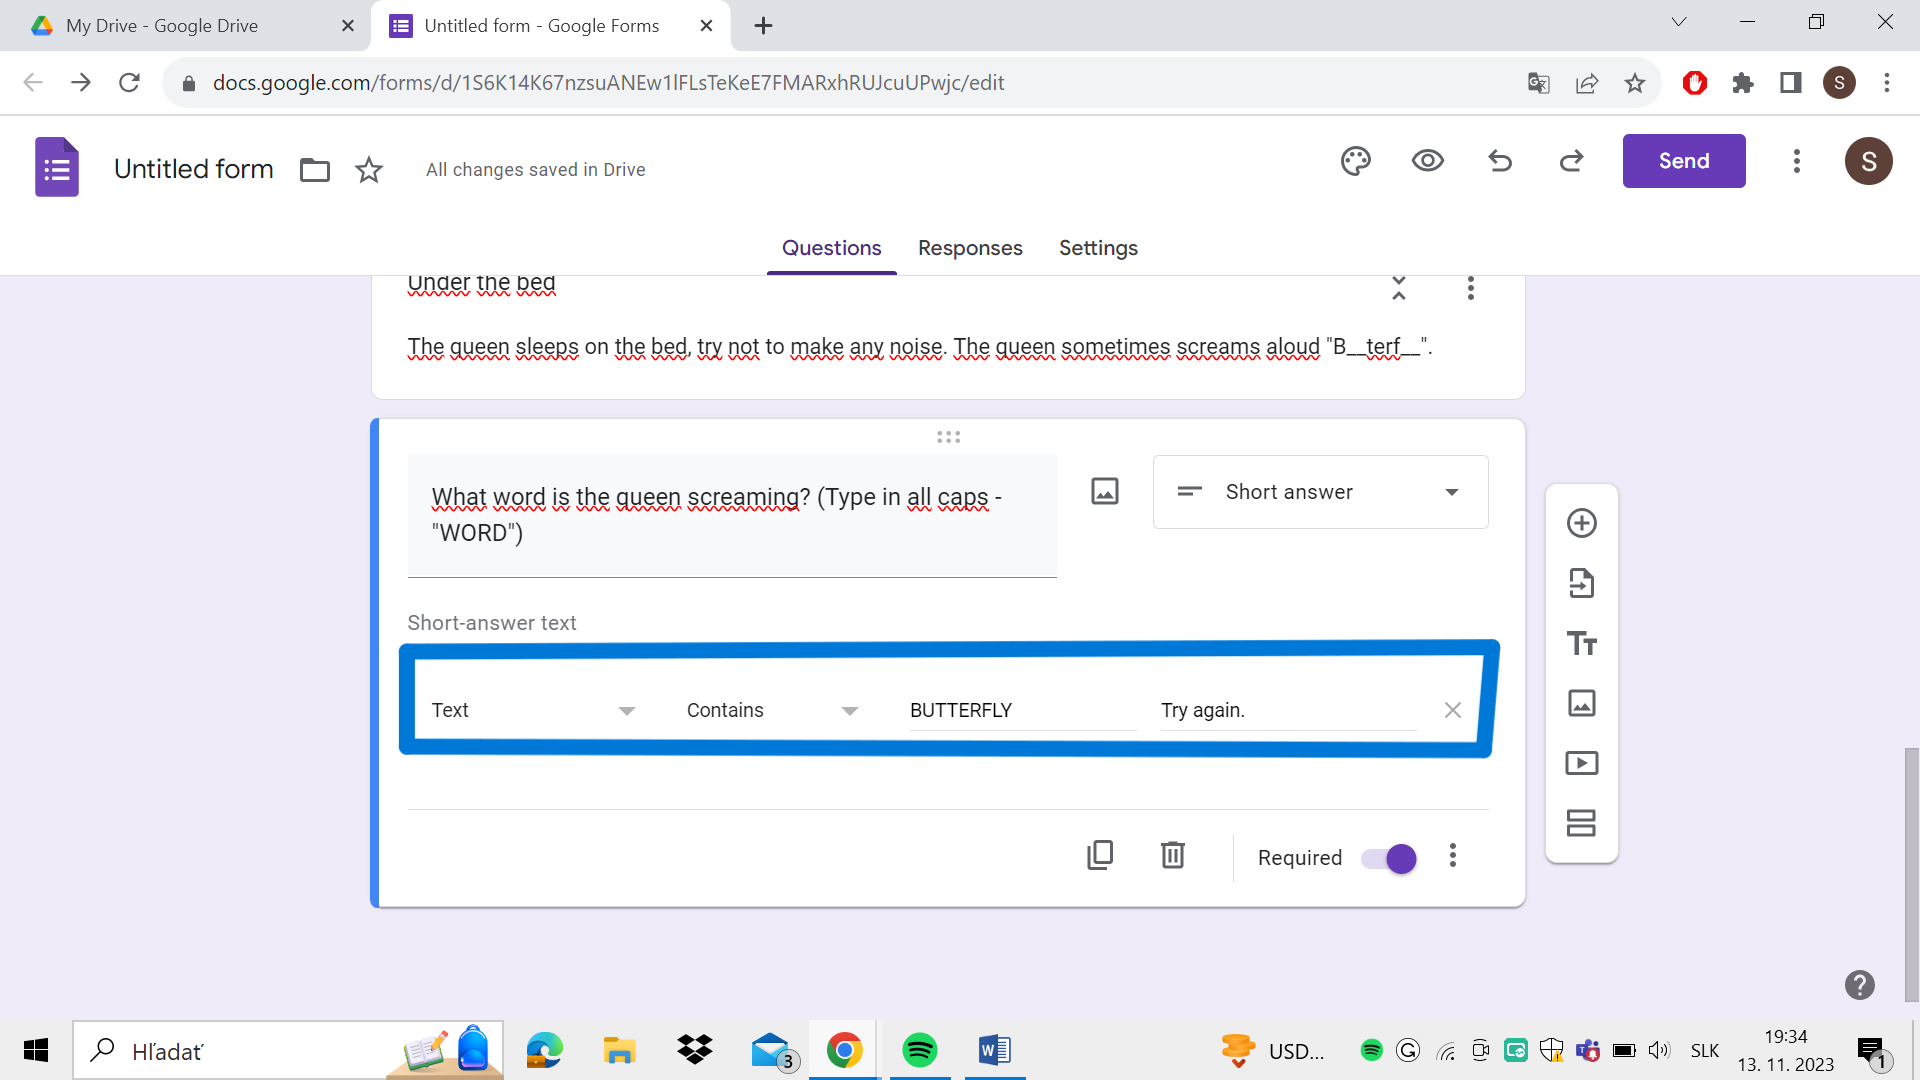
Congrats! Now you know how to make a text-based task for you escape room!
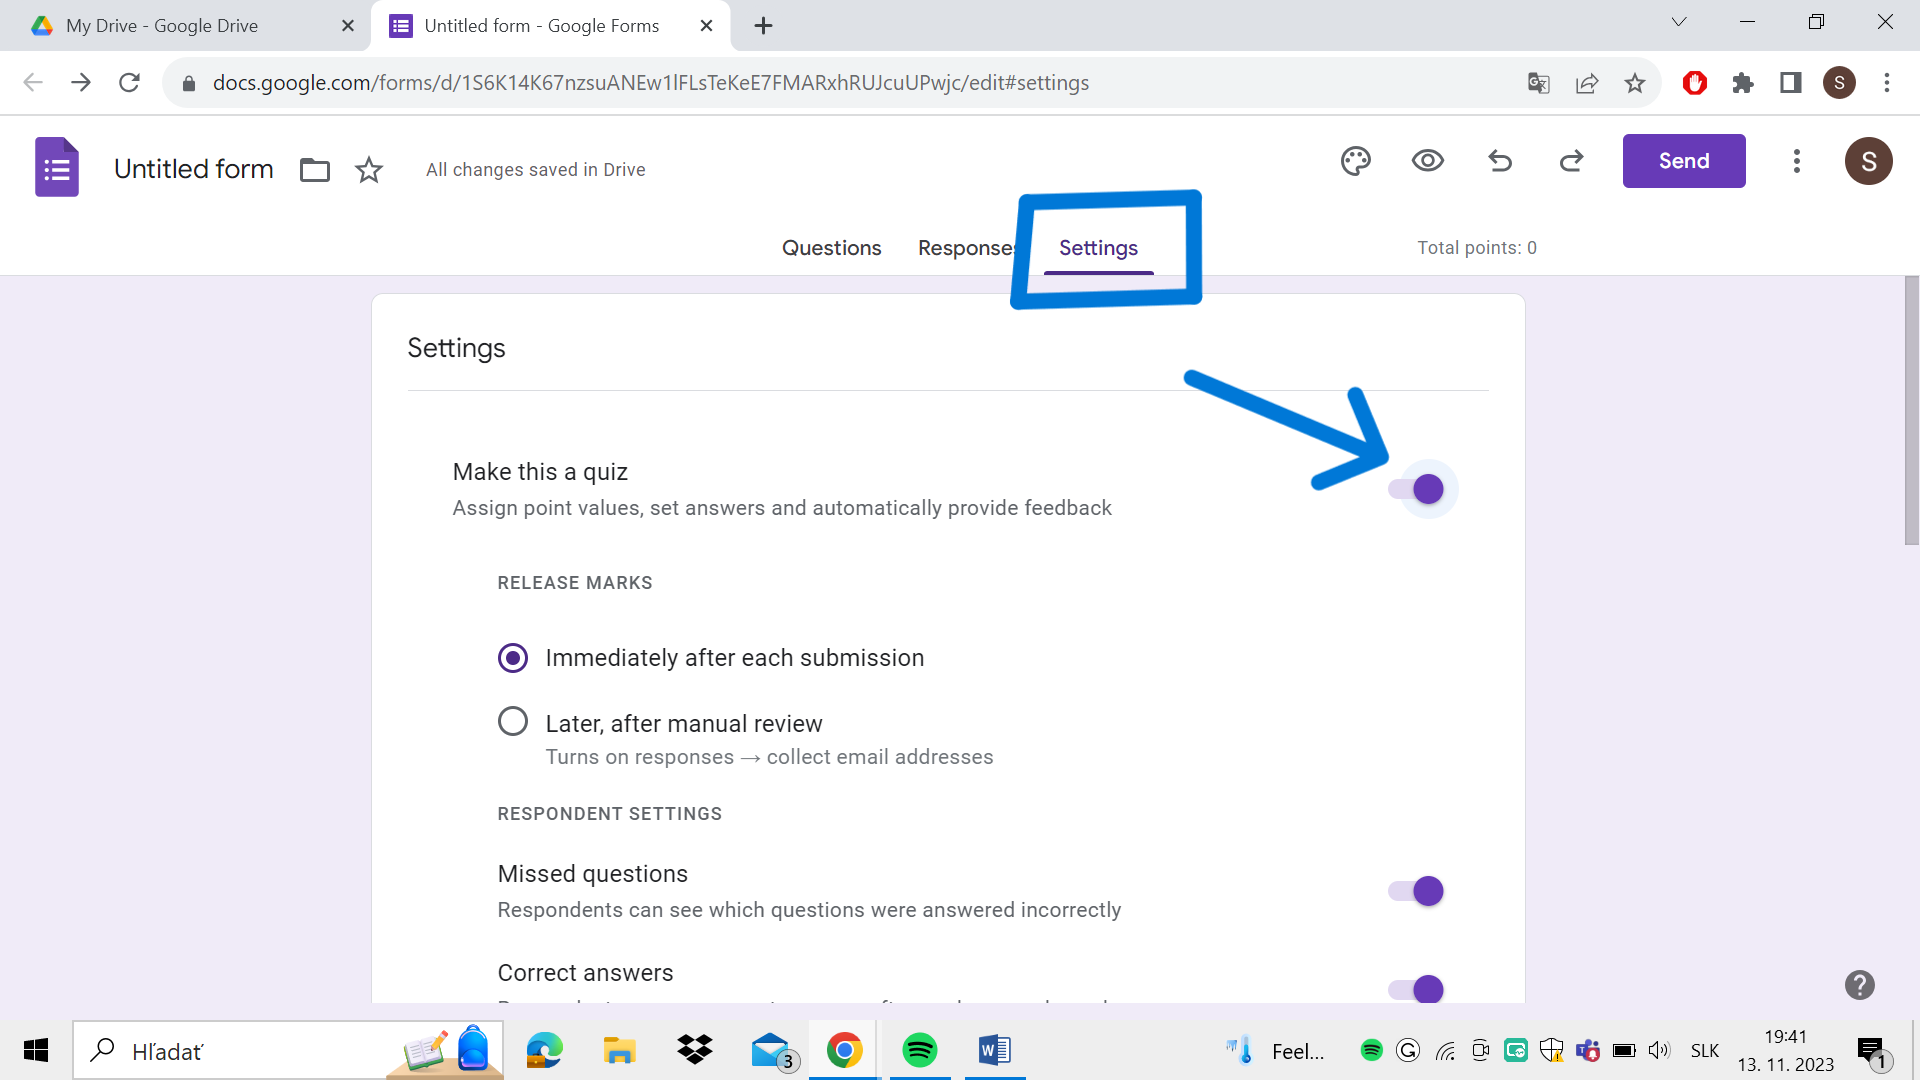
13. The last step consists of making it a quiz! So you get the answers of the participants right into your Google account! In order to do so, click on the Setting on the top and then click on the “Make this a quiz” box.
14. After
you´ve createed all of your tasks, click on the eye icon on the top and you can go
through your escape room and try it out yourself! 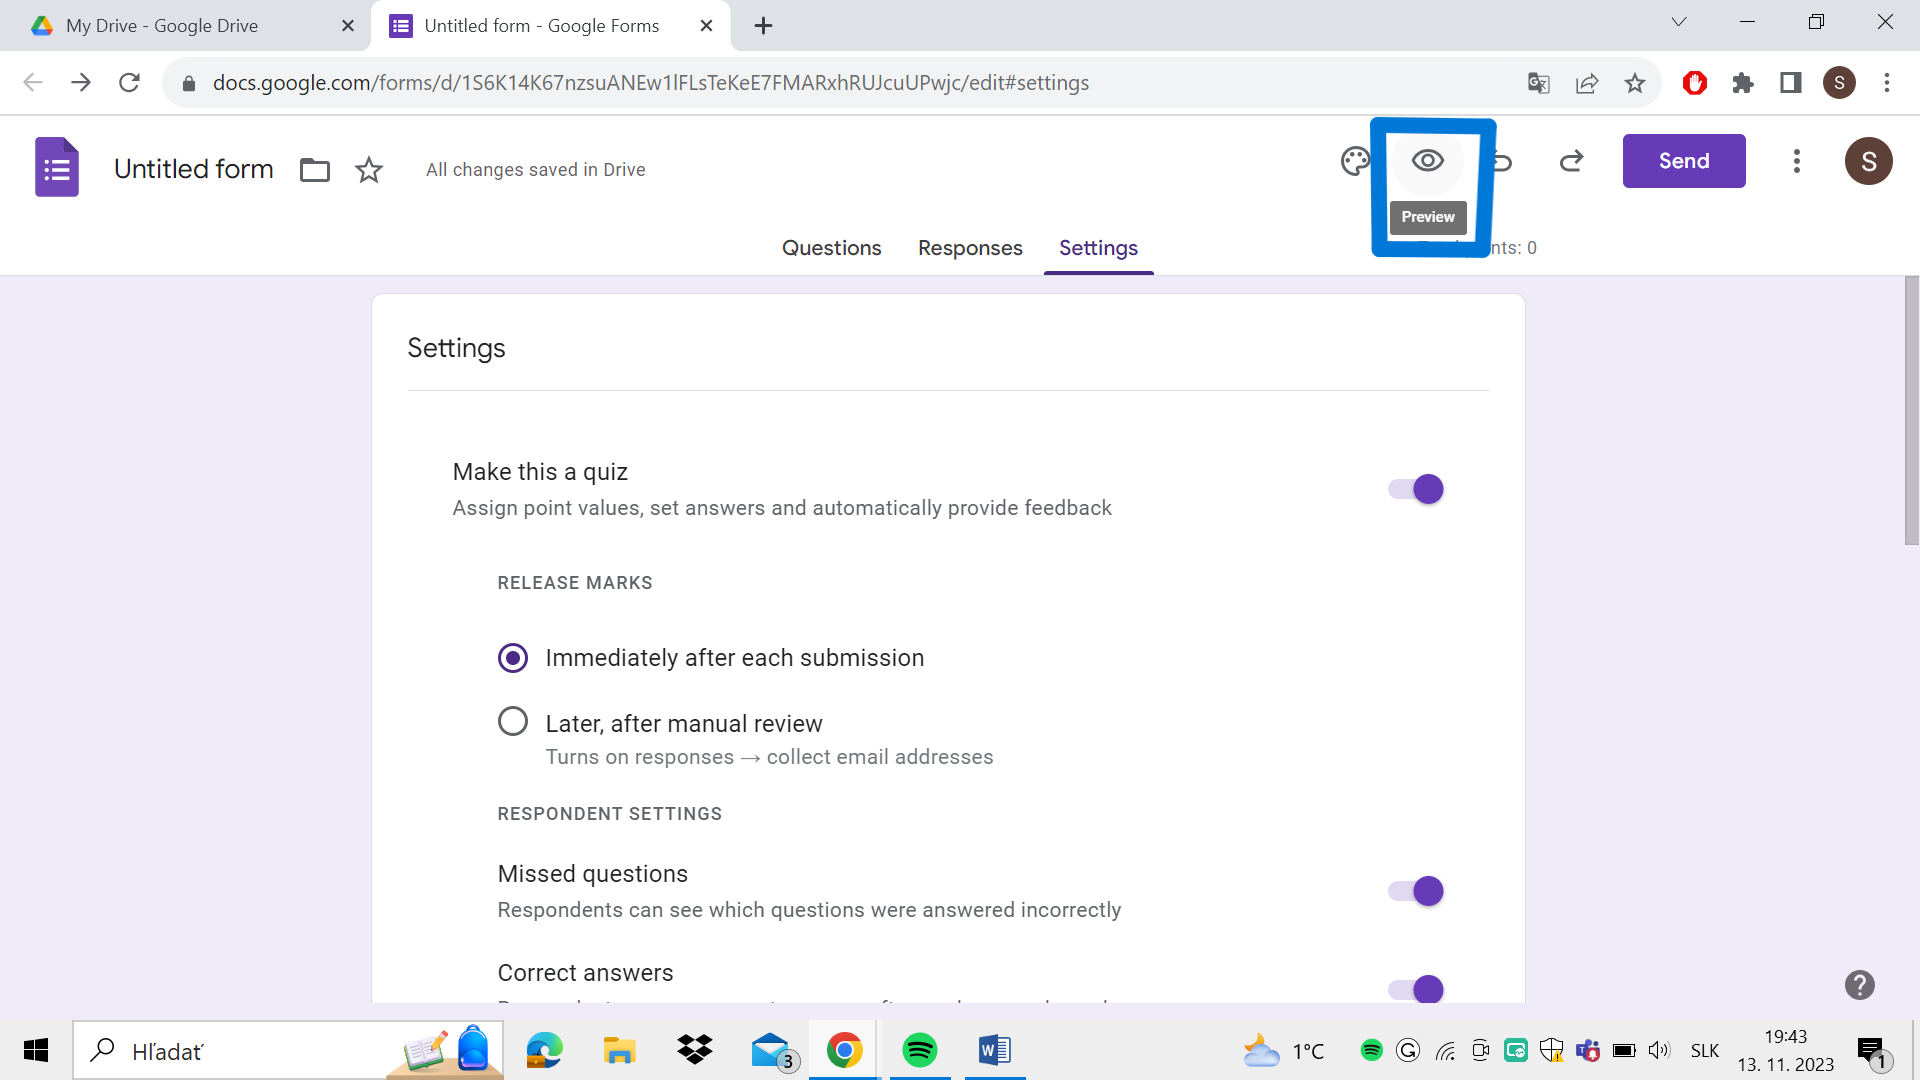
These steps should help you with creating your own escape room! But it looks quite sad, doesn’t it? Let´s make it more lively by adding some colours!
Adding style to the Escape Room!
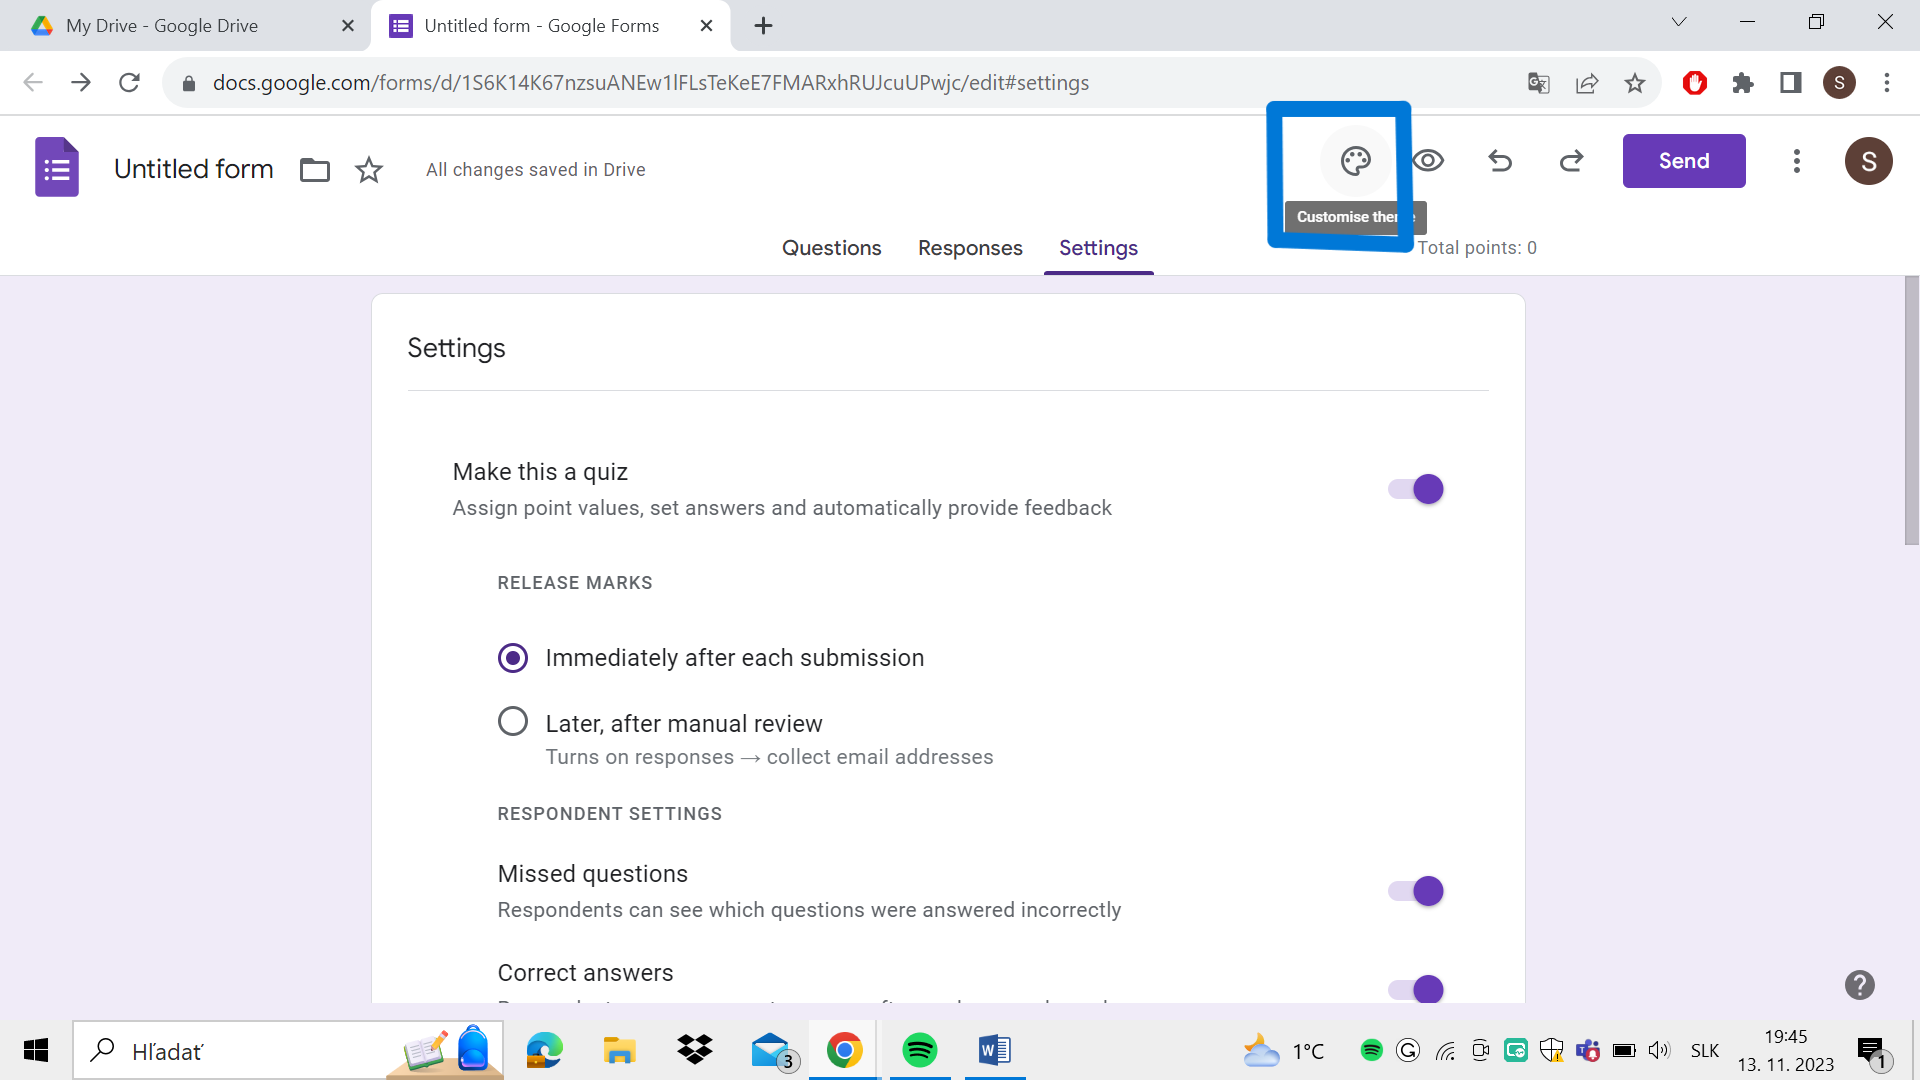
1. To make it more colourful, click on the colour pallet icon, beside the “Preview” (eye) icon
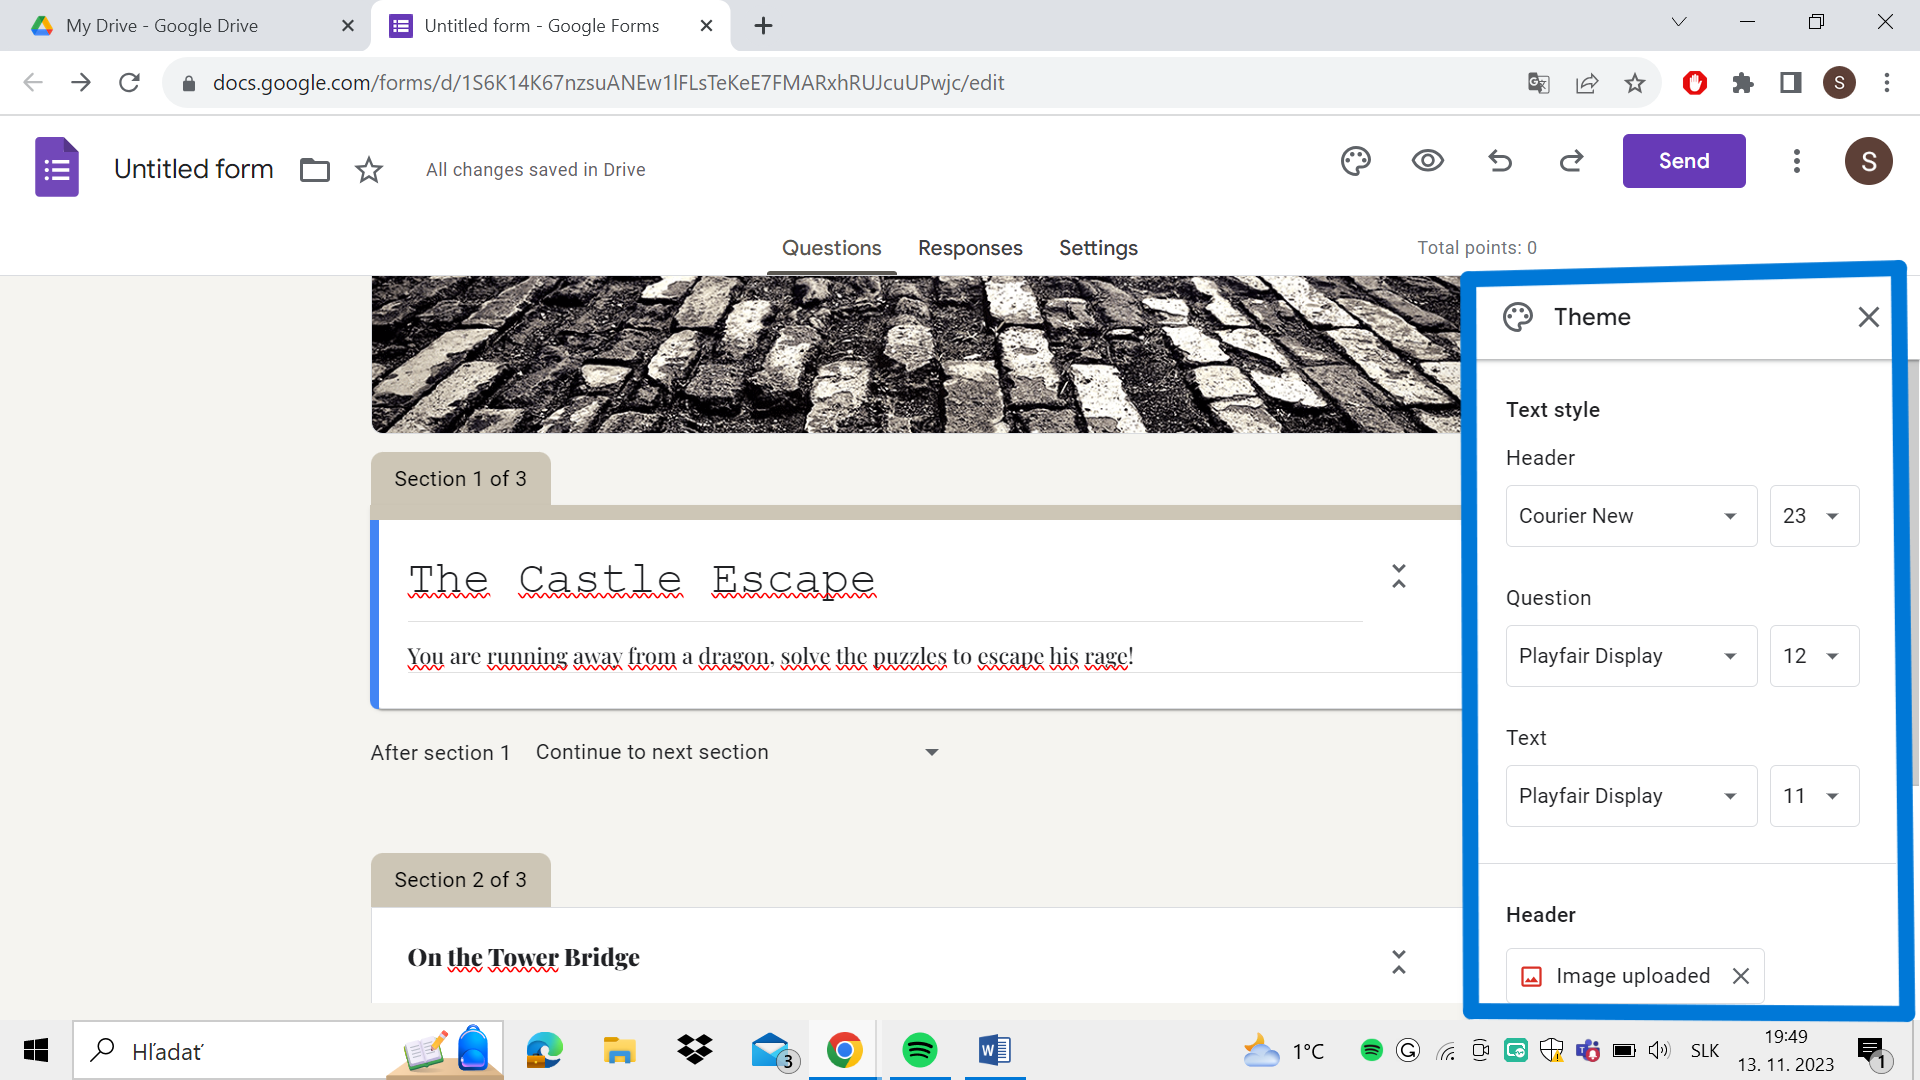
2. You can upload images as “Header”, change the font of the text, and its size and also choose colours of the background. For example, it can look like this.
Now, it’s your time to create an escape room! I hope these instructions helped you! Good luck and have fun! :)