Wordwall: Create better lessons quicker
4. How to use Wordwall
In this chapter you will find information, how to use Wordwall platform. There will be general information about using it, which may go for every template you choose. This chapter shows you step by step, from how to create your account to creating activity. It learns you how to use this platform in general.
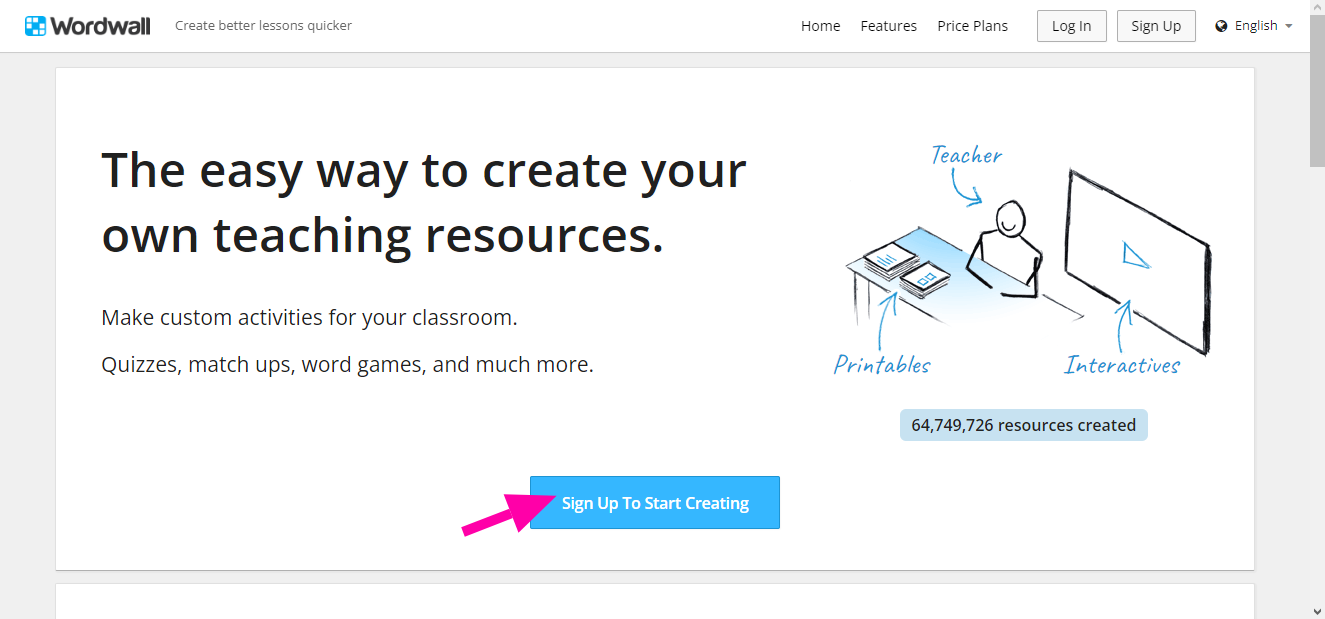
a.) Creating account:
Go to Wordwall and sign up here clicking on this button:
b.) Creating activity:
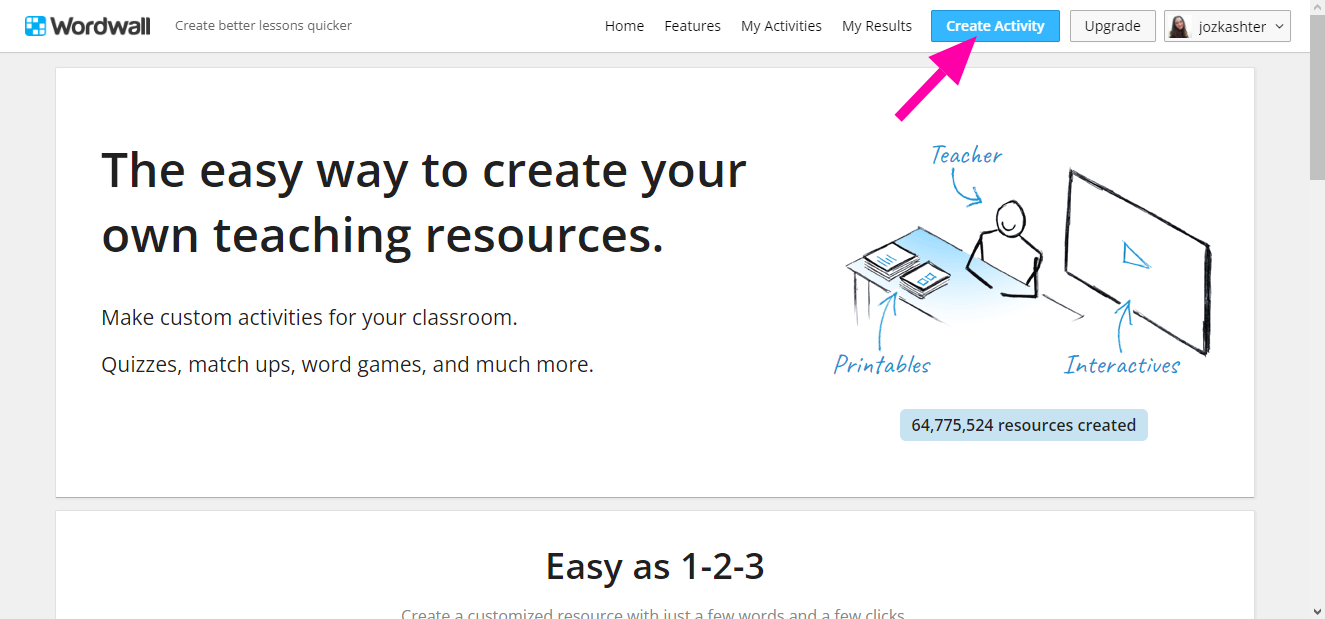
After you log in, click on 'Create Activity' button.
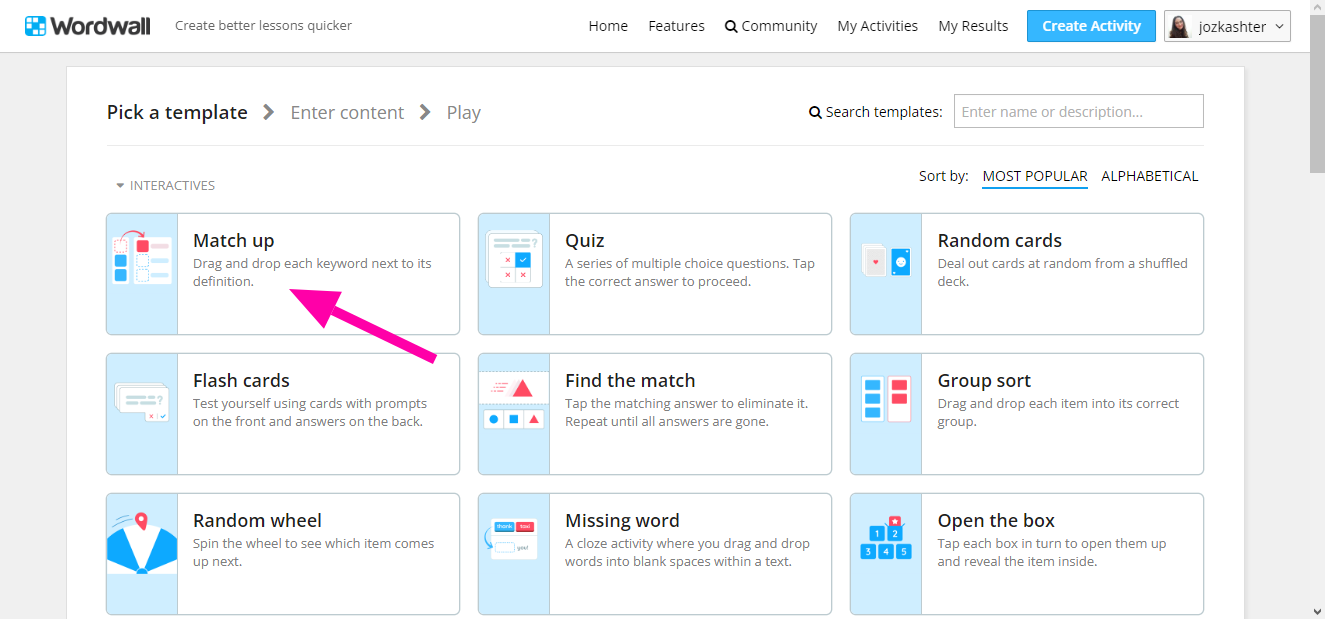
The platform will show you many templates, from which you can choose from. Doing each activity, will be explained in further chapters. There will be shown the general using of each activity. We pick first template, which is very easy to use and show you basic rules of using:
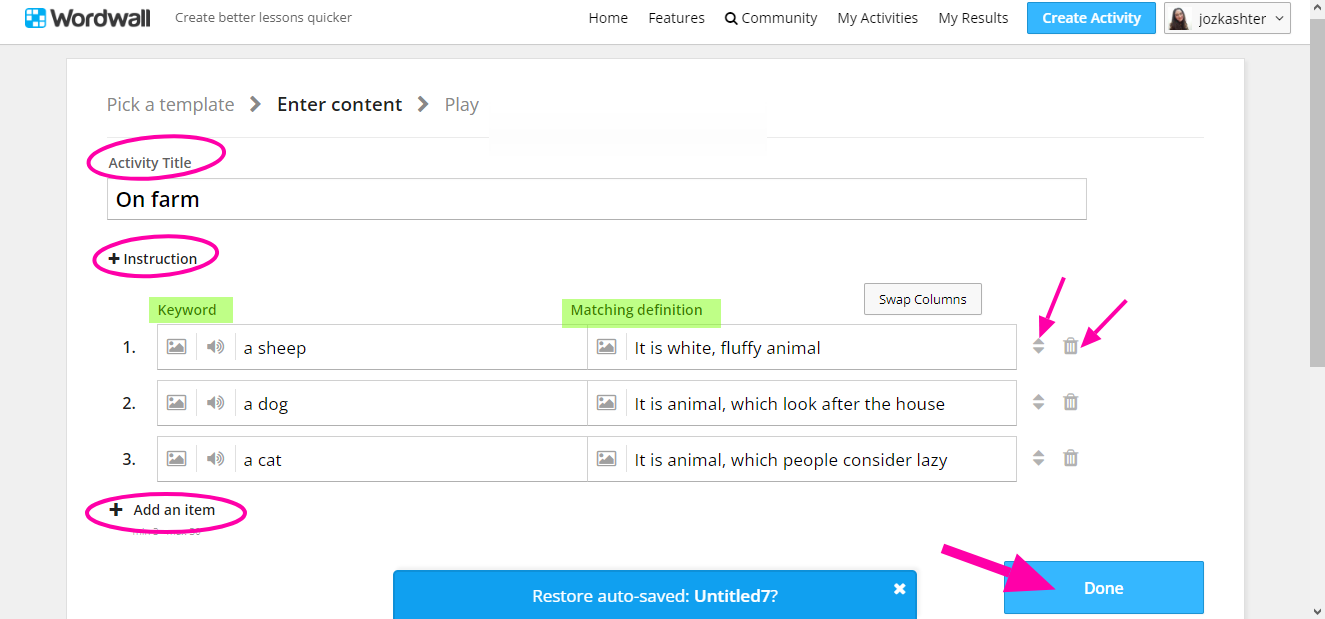
There will be always the window for writing the Title of your activity. Below it you can find the Instruction button with plus +. You can add it there, but its optional. Further, there will be windows, where you must write Key words, which students are supposed to learn or find and match with their meaning. For meaning there are opposite windows. There you must write the meaning of your Key words. You can add there also the pictures and sounds. However these details we will describe in further chapters. When you are finished with filling the key words and matching definitons, you can click on the button 'Done'.
If you want to add more key words, you can click on plus button +, which call 'Add an item'. It allows you to add as much key words as you need. Then you can also switch the order of particular key words and their matching. On right side of matching definition, there are arrows, which allows you to manipulate order, if you want so.
If you want to delete key word or item, you can click on icon Trash 🗑 and delete the item.
c.) Basic options for every activity:
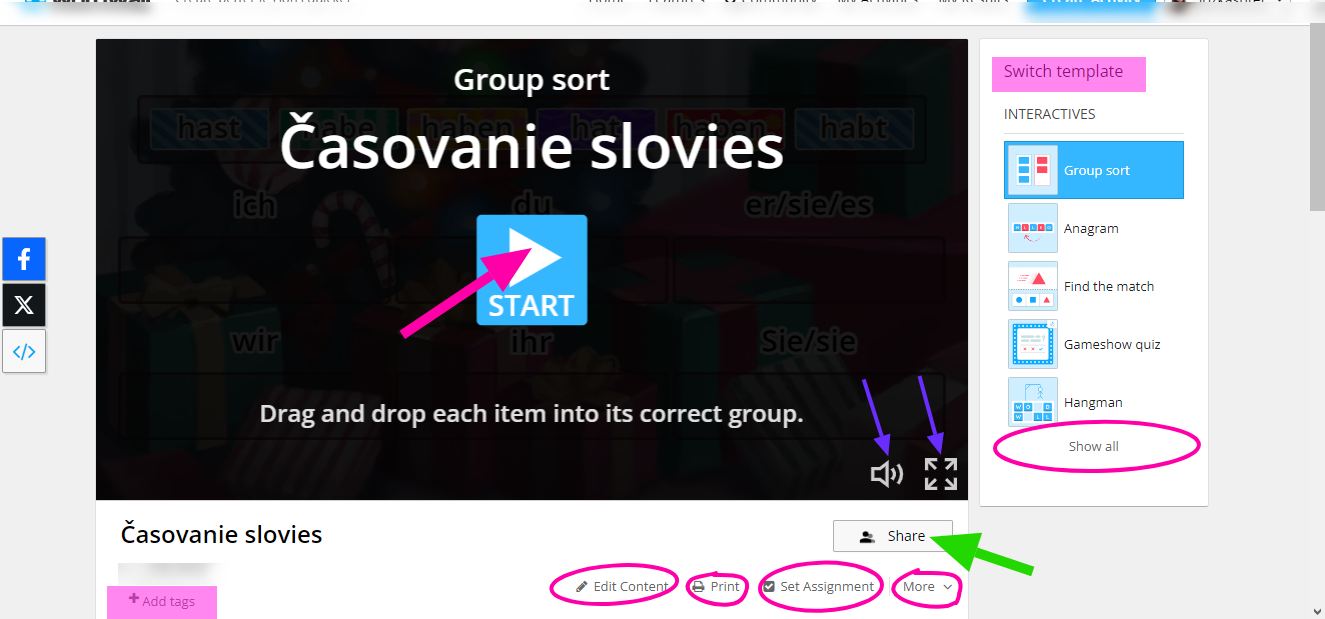
There are many options for activities, which go for every activity. On printscreen you can see, where you can find these buttons and below you can find the description to every button:
I. START:
The button 'Start' allows you to start your activity you created with your students.
II. ICON SPEAKER:
The icon 'Speaker' allows you to turn on or off the music and sound effects of your activity.
III. ARROWS in SQUARE:
The button next to speaker allows you to extend your activity to regime on whole screen.
IV. SWITCH TEMPLATE:
The button 'Switch template' allows you to switch template of your activity to another template. The platform automatically switch to another template and rearrange your key words and definition to fit the template correctly.
V. SHOW ALL:
The button 'Show all' show you every template you can use with your chosen template. As we said in chapter 'Drawbacks', not every template is compatible with other. So it depends on, which template you choose in the beginning of your creating.
VI. SHARE:
The button 'Share' allows you to share your activity with other teachers. You have there publish settings, where you can add tags to your activity like age, subject and topic. You can also change the title of your activity. If you want to, you can remain your activity private.
VII. ADD TAGS:
As we said above, you can manage your tags of your activity, such as age band, subject of your activity and topic.
VIII. EDIT CONTENT:
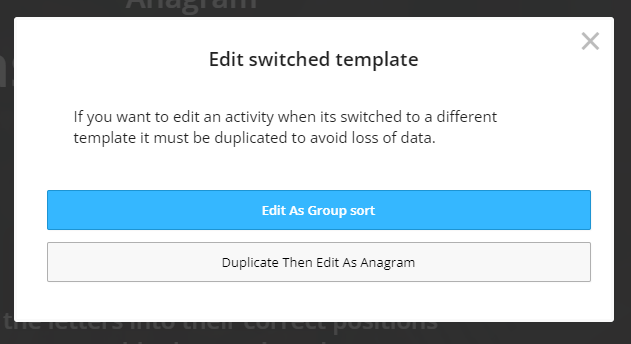
The button 'Edit content' allows you to edit the content of your activity again. You can delete or add items if you want. However, if you have switched to another template before clicking on this button, the platform shows you two other options:
=> to edit the template you have switched to (the button 'Duplicate Then Edit As'...)
=> or edit your original activity (button 'Edit As'...)
IX. PRINT:
The button 'Print' allows you to print your activity. You have there many other options such as how many activities you want per page, changing instructions, orientation and what you want to be shown on your page (Title, Name, Date,...). You can choose there from templates too. You can also print it immediately or download the activity as pdf.
X. SET ASSIGNMENT:
The button 'Set assignment' allows you to set your assignment to your students. There are many difficult options, which we show below:
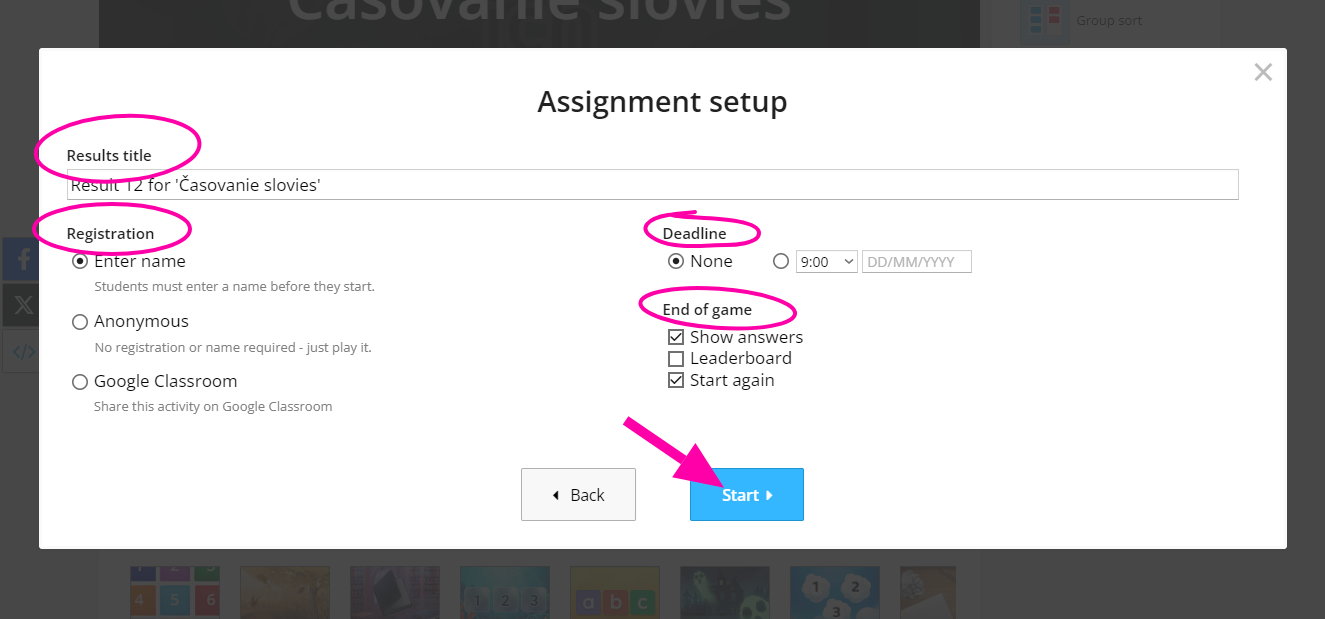
You can rename your title below 'Results title'. Then you can find there 'Registration'. There are three options to choose:
=> Enter Name: If you choose this one, the students are required to enter their name before starting the activity. It is good for collecting the results from your students.
=> Anonymous: Students are not required to set their names and can do activity anonymously. It is good, when you do not want to students to compare themselves with others, just to revise the lesson in the end and find out which area they struggle with.
=> Google classroom: You can put your link for activity to your google classroom. It is good, when you want to set the homework for your students.
You have there 'Deadline'. There you can set the deadline for doing activity. And last one is 'End of game', which are the options, how the game ends. What buttons do you want to be shown after the game: Show answers, Leaderboard and Start again.
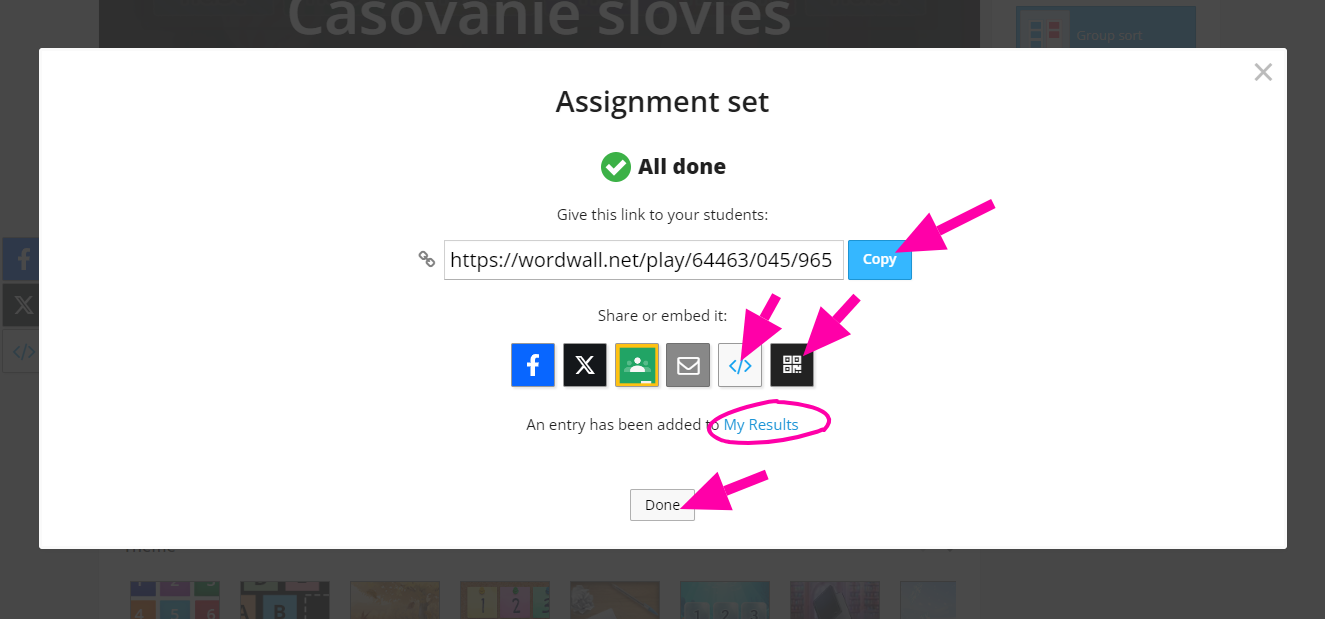
When you are finished, you can click the button 'Done'. There you can find the link for your students, which you can copy easily by clicking on the button 'Copy' or you can share with them QR code, which is also there or you can 'Embed' it on your own website, which allows you the icon next to QR code. You can easily follow the results of your students by clicking on button 'My results'. Below you can find the printscreen of these buttons. When you are finished, you can clink another button 'Done'.
XI. MORE:
The button 'More' allows you to 'Embed' your activity on your website (but without collecting the results) or share the 'QR code' immediately. Thre is one option to 'Rename title' of your activity.